Recipes from Africa or with a African twist by WorldSupporters - Bundle
Recipes from Africa collected by WorldSupporters
- 1238 reads


 Buñuelos de Nicaragua
This recipe is traditionaly made around the holiday season, it compares to the Dutch "Oliebollen". It is a sweet, deepfried treat made from Yuca's (a cassave root) served with sugary topping called miel (honey) made from water, sugar and cinnamon.
Peel the yuca (note this is not easy, you need a sharp knife and a bit of persistence) then cut the yuca up in smal pieces and put them in the blender. Add the quarter cup of water and mix until it is a smooth mush, add the crumbled cheese and mix it in well.
Heat a pot with olive oil, while doing that put on a pot with the cups of water, sugar and cinnamon stick in it. Make sure it is kept just below boiling point.
When the oil is heated take two spoons to shape a little bit of the dough into a ball every time. Deepfrie them until golden brown. Let them drip of and serve while still hot with the sirup over it, enjoy!
Ready In: 50 min.
Ingredients:
Classic Guatemala Enchiladas
You’ve probably heard of enchiladas before, but you might be thinking about a rolled tortilla filled with chicken, or beef, topped with melted cheese and sauce, which is more like a Mexican enchilada. These enchiladas -Guatemalan enchiladas- are made by topping a fried or toasted tortilla (called a Tostada) with lettuce, beets, onions, tomato sauce, fresh parsley, an egg slice…and the last touch, a sprinkling of dried Guatemalan cheese (Queso Seco). Parmesan cheese can also work. Sometimes people also add ground beef or chili spice.
Buen Proveche!
Ingredients for 25 Enchiladas:
Procedure:
Filling:
Onion “Escabeche”
Vegetable Mix:
Tomato Sauce:
Assembly:
Ready In: 0 min.
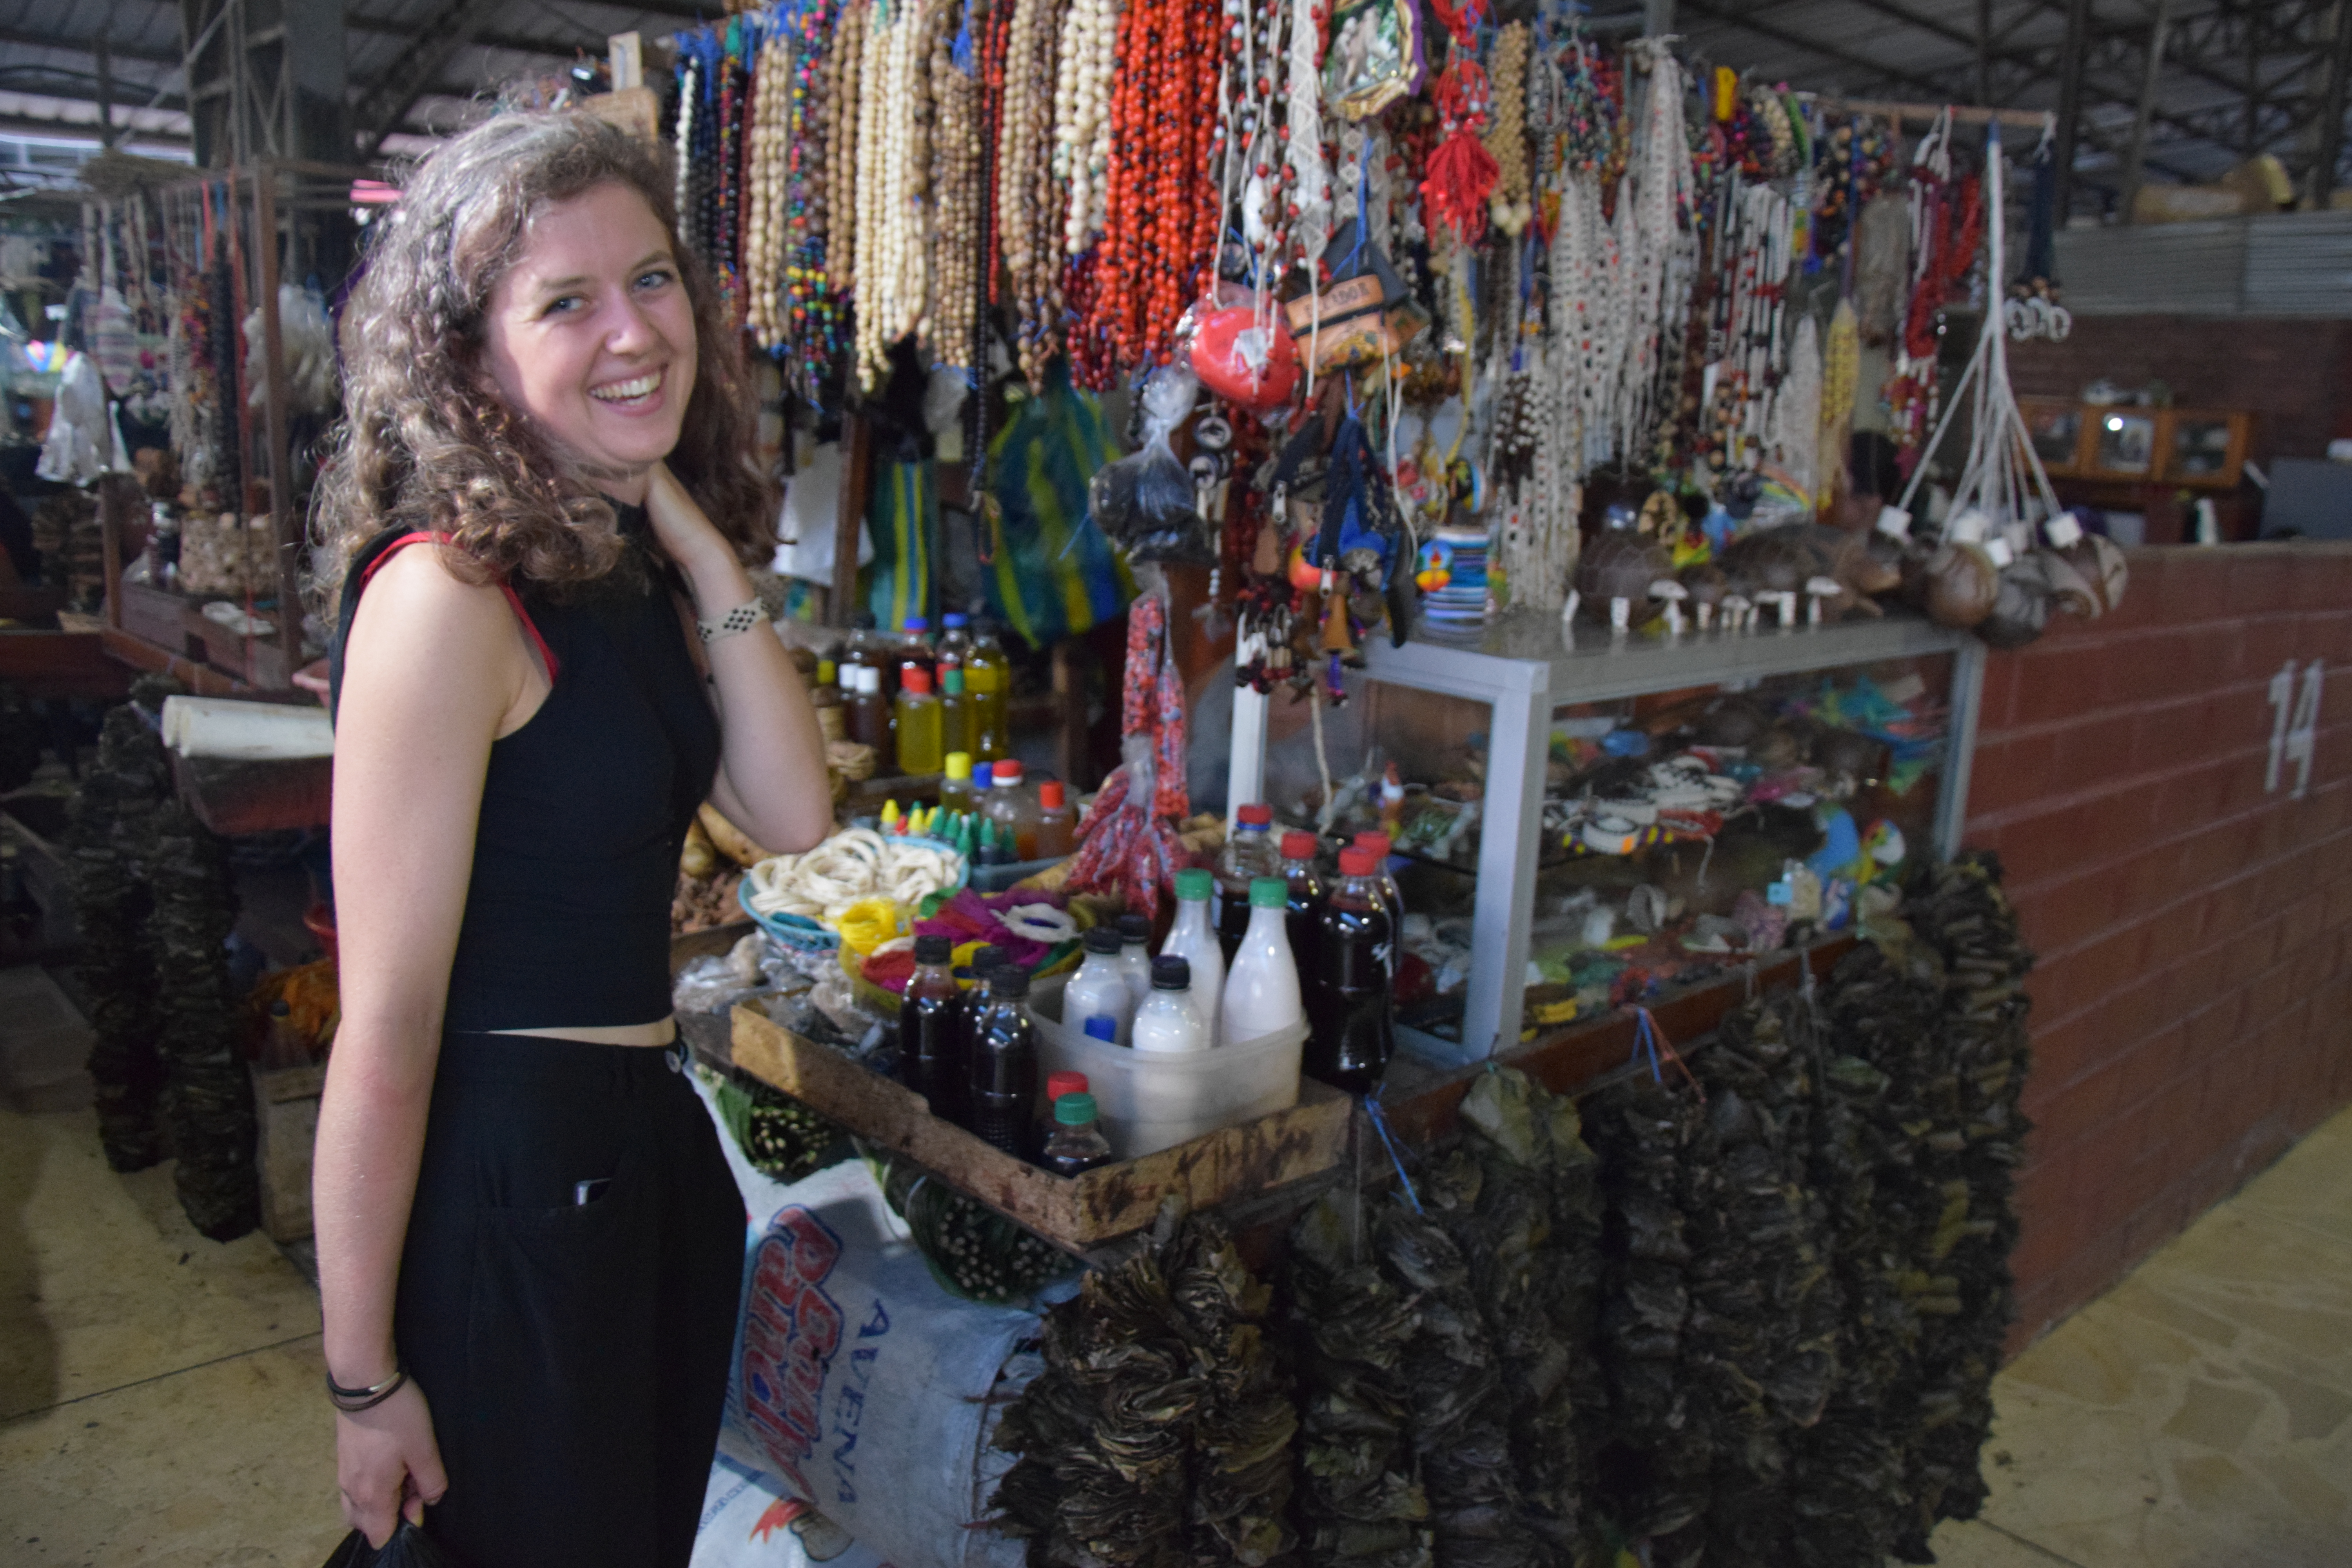
 Ecuadorian Fruits :D
Hola Amigos!
Fruits are one of the main parts of a healthy diet, but also just simply DELICIOUS. Well, if you want a good choice of fruits, head out to South-America. It's FRUIT HEAVEN! The fruits here are sweet, fresh, without travel pollution and cheap, what else do you want? Well, today for you, my fruit amigos, I will describe some typical fruits which you can find in Ecuador and other parts of South America. I will not talk about the easily recognisable ones like pineapple, mango, grapes etc, but about the ones I was super curious about. Fortunatelly, there are so many that I can't even describe all of them so you'll still have to go on an adventure yourself. Hopefully, however, this blog can help you to get through an Ecuadorian market a little bit easier than I did, if you happen to be at one sometime.
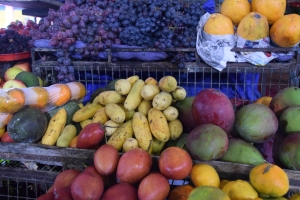
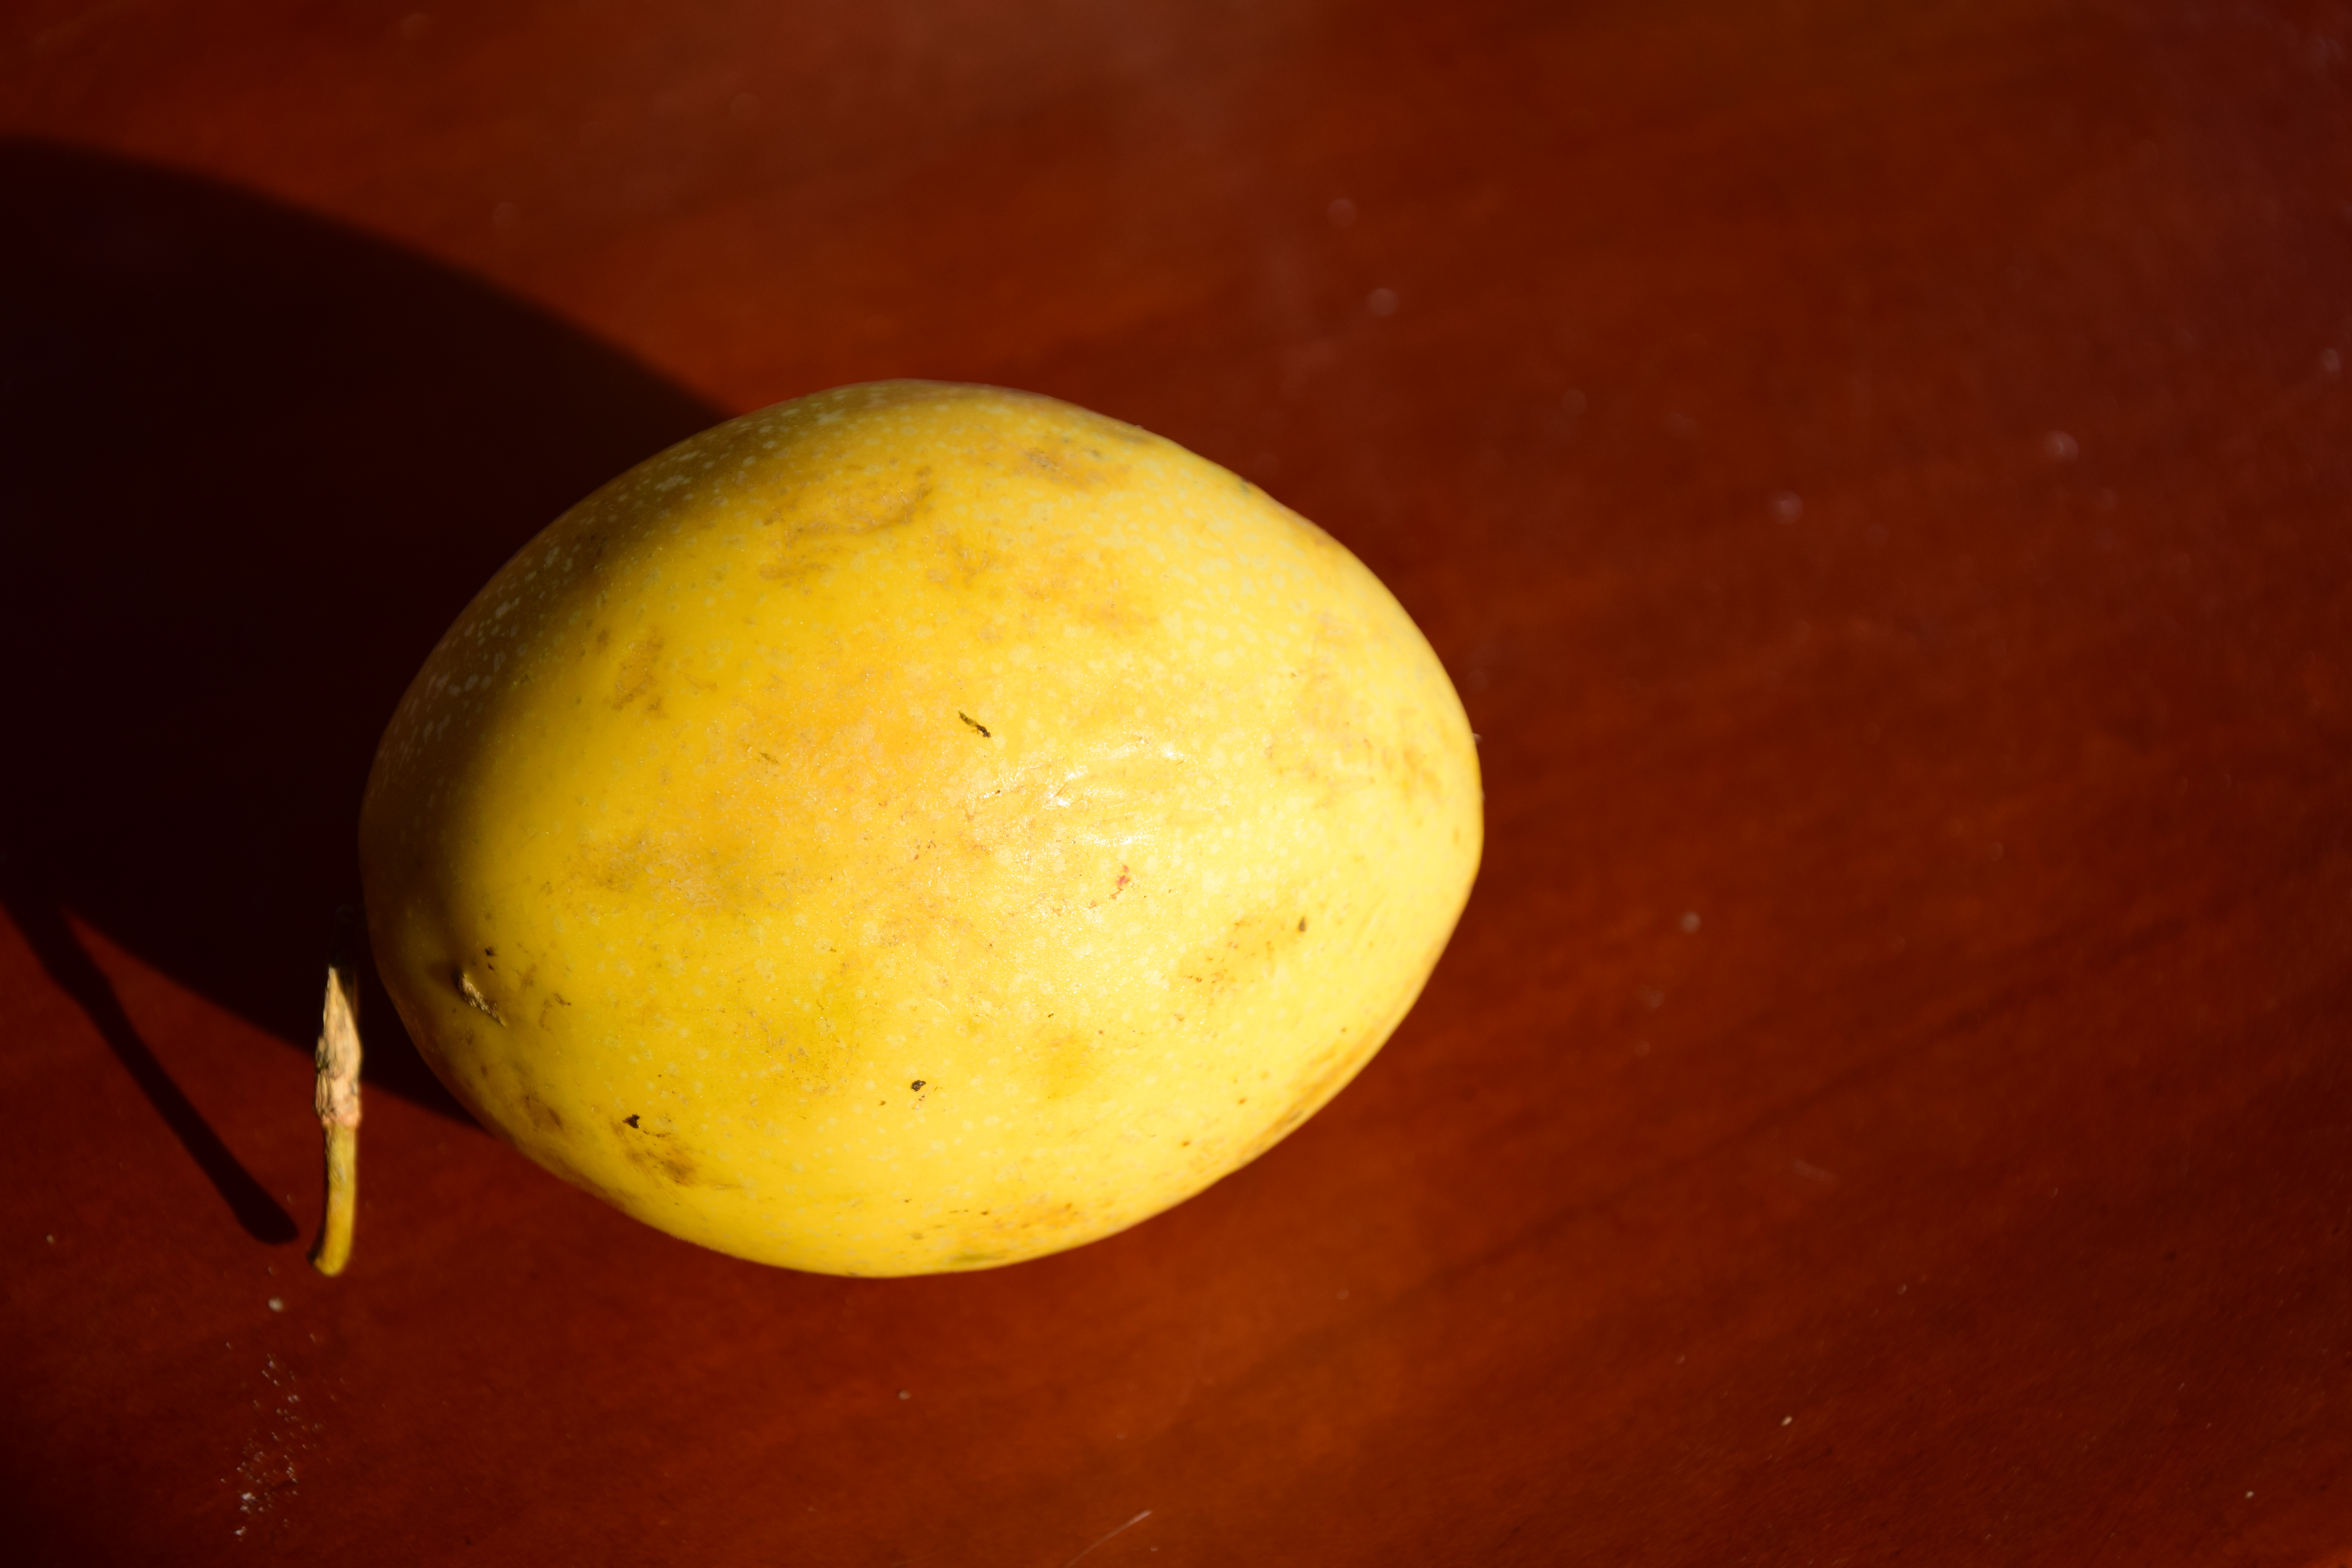
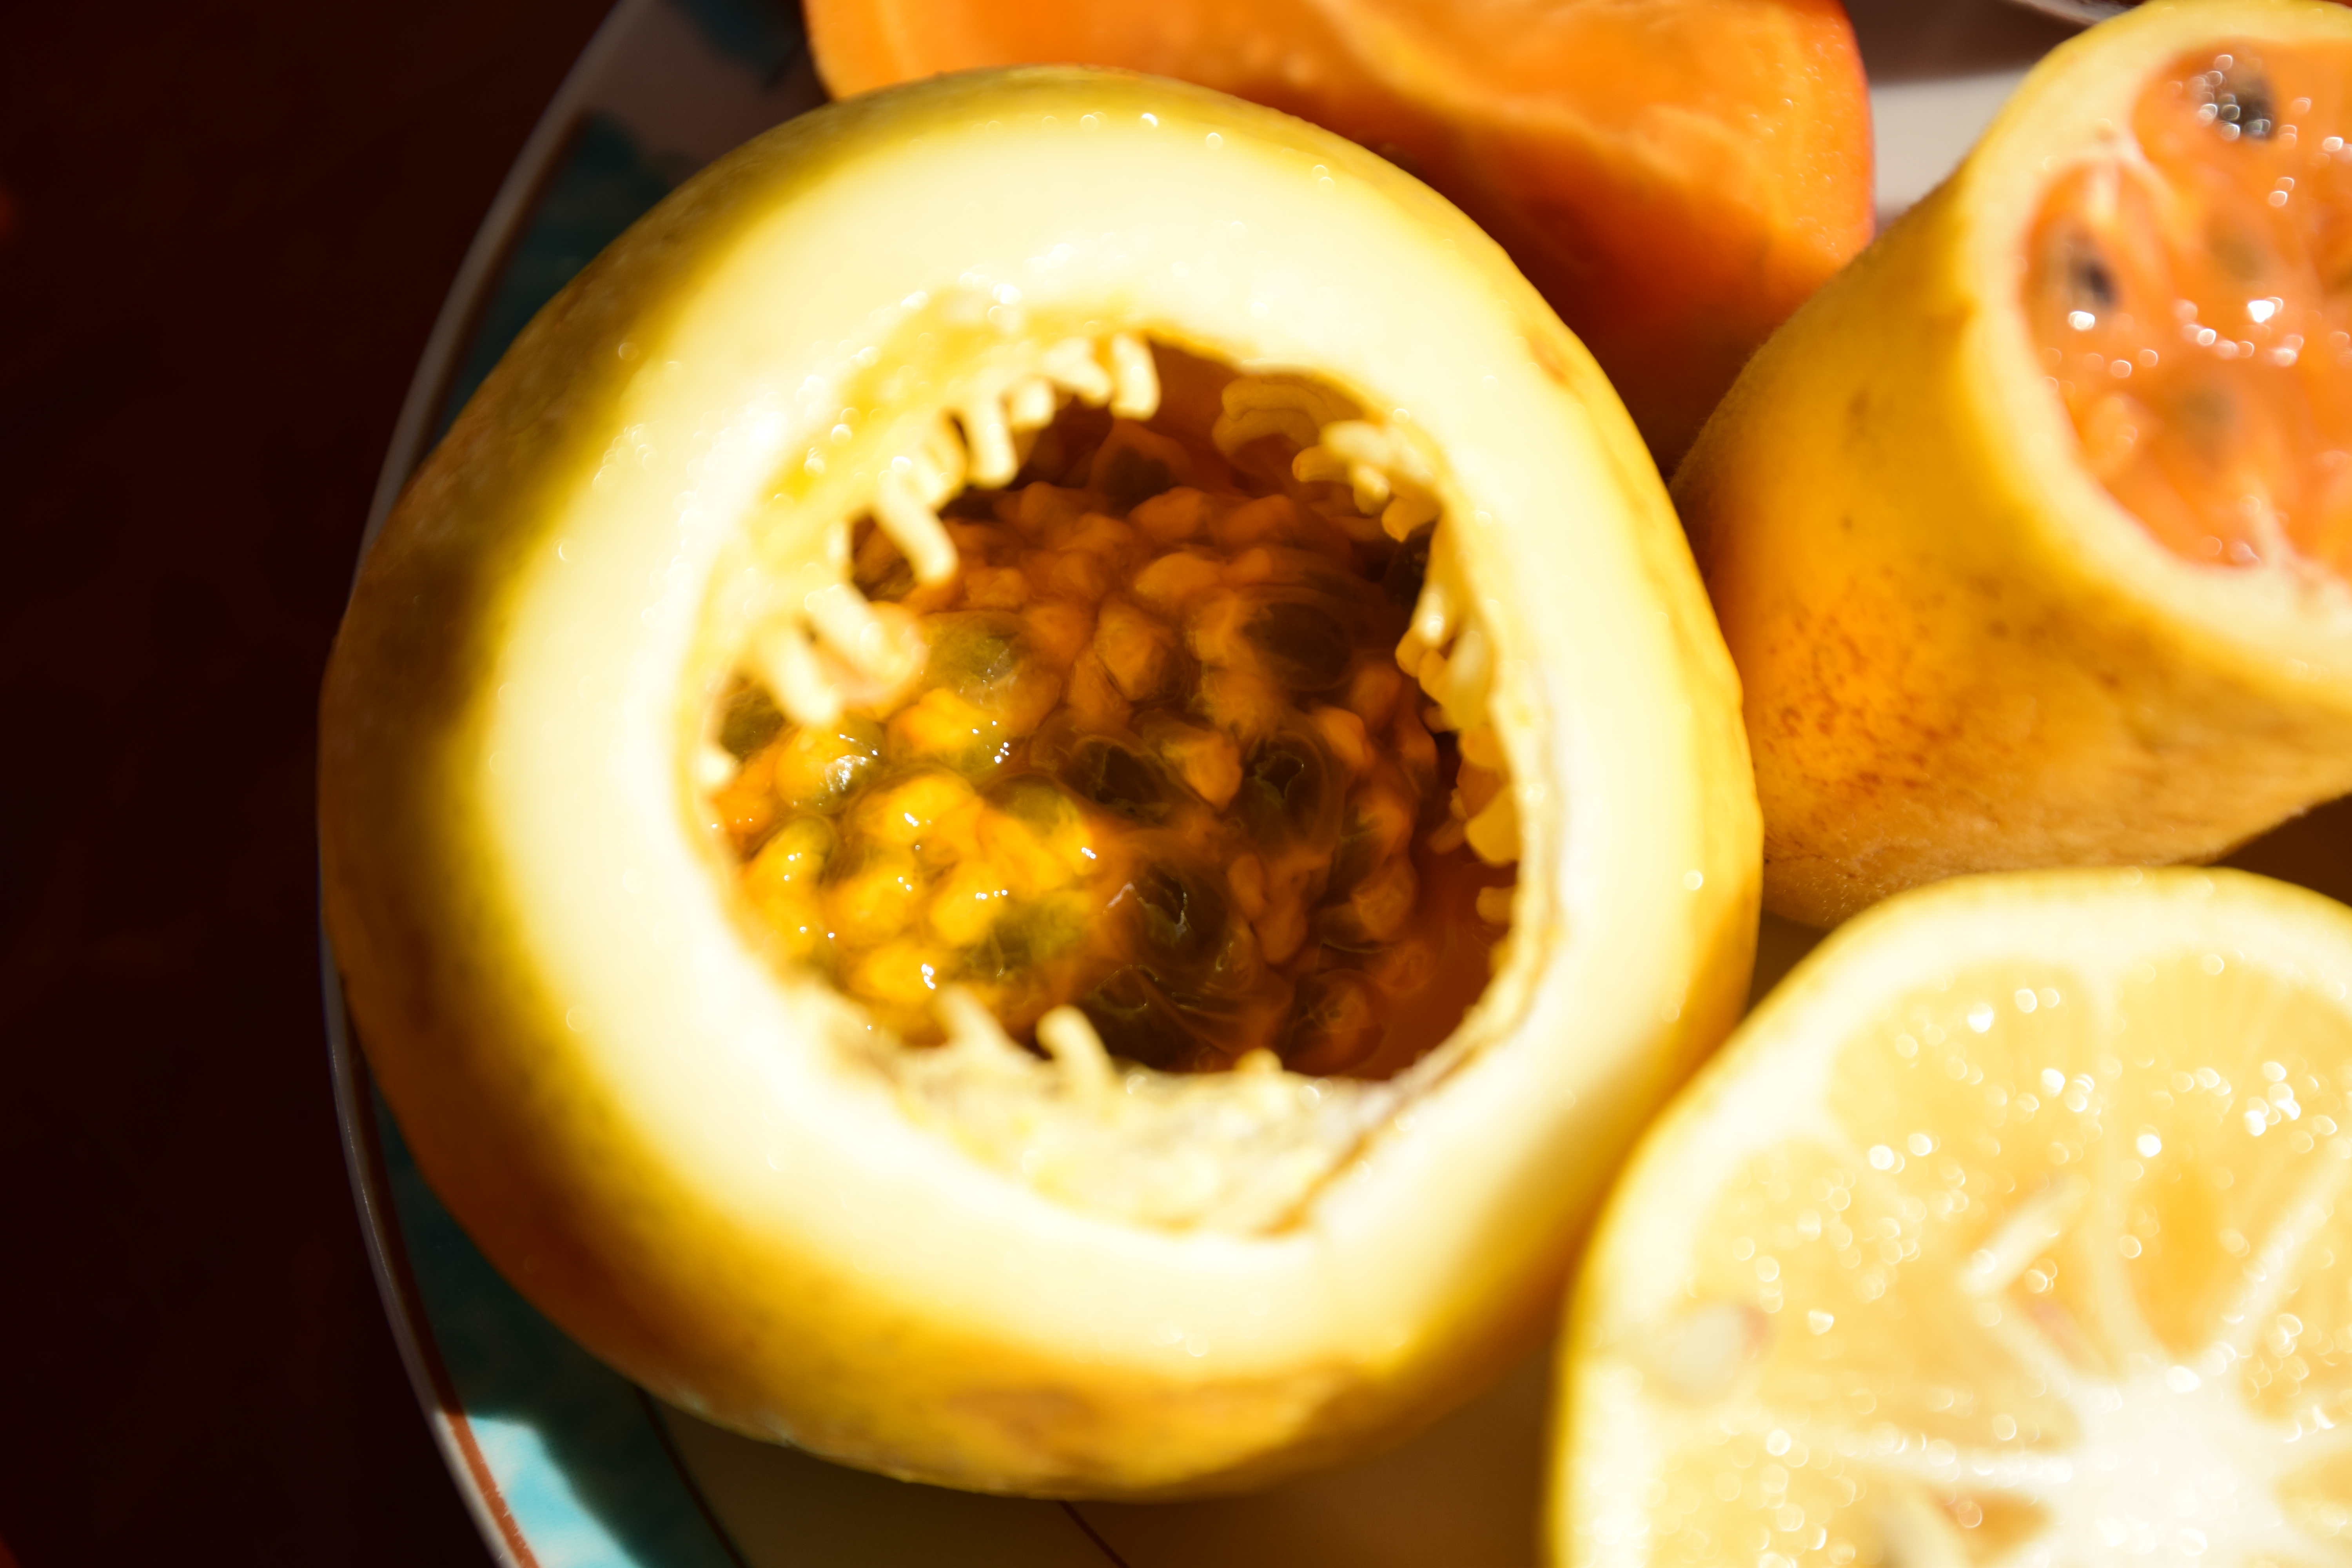
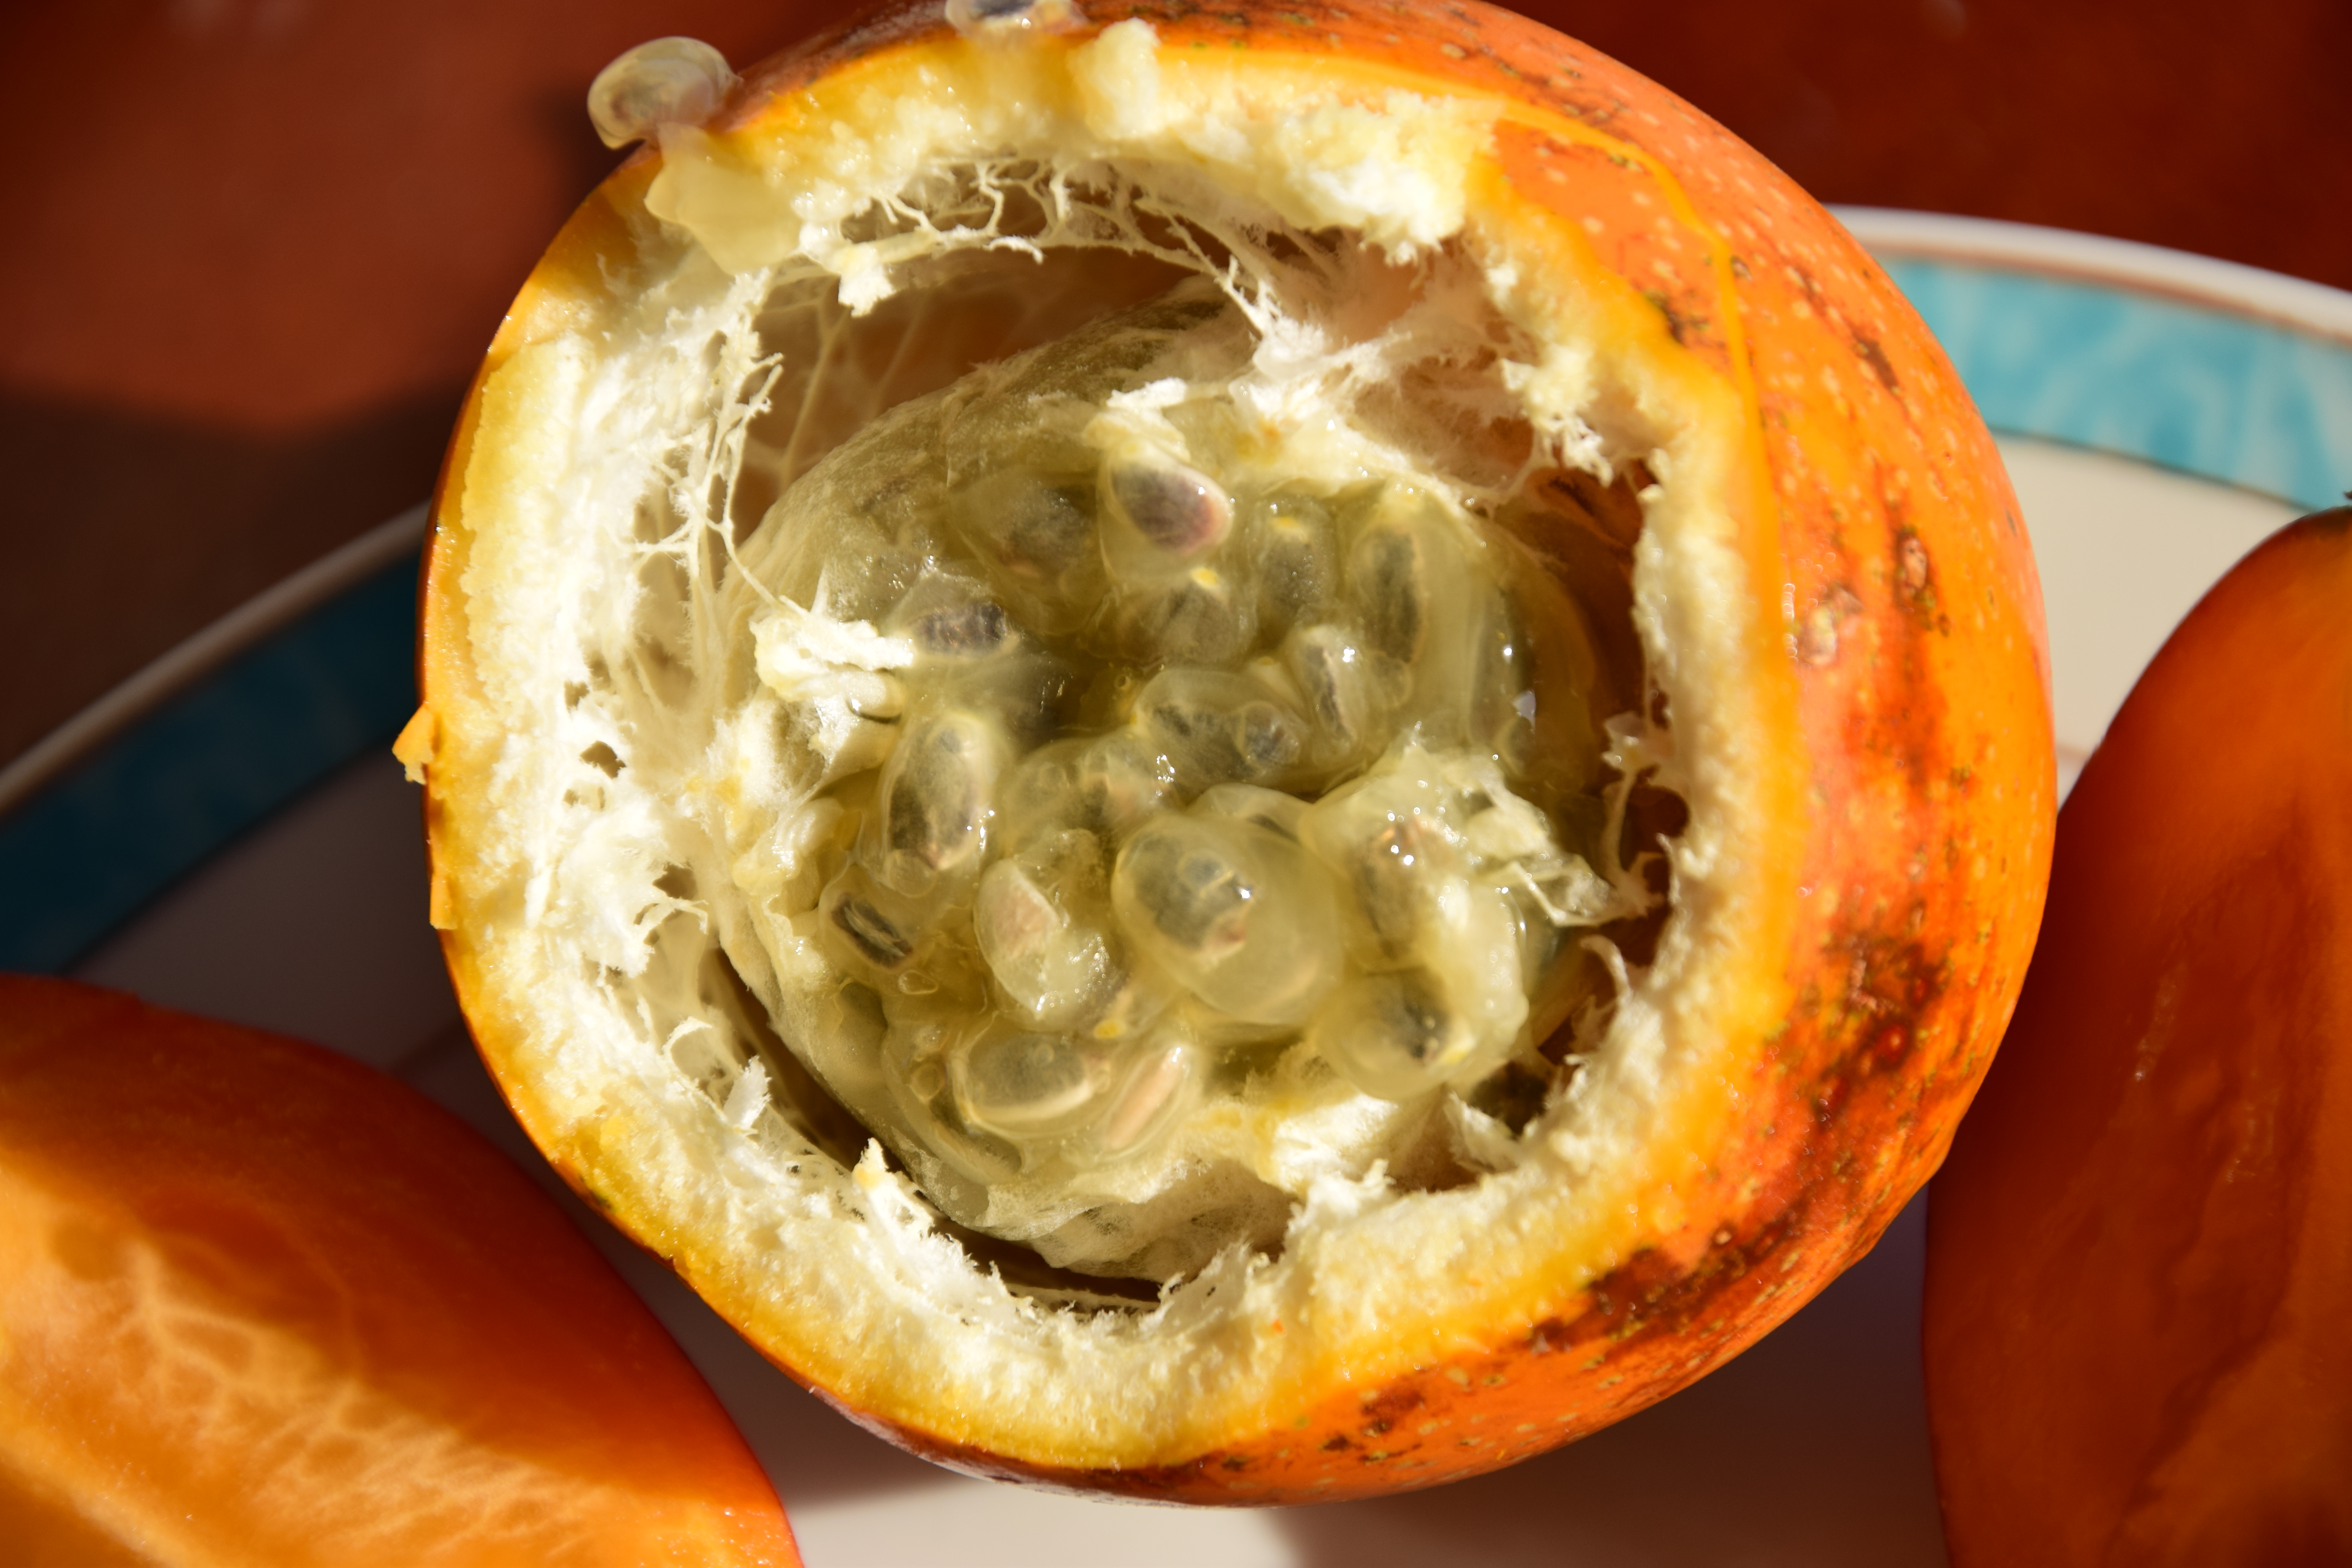
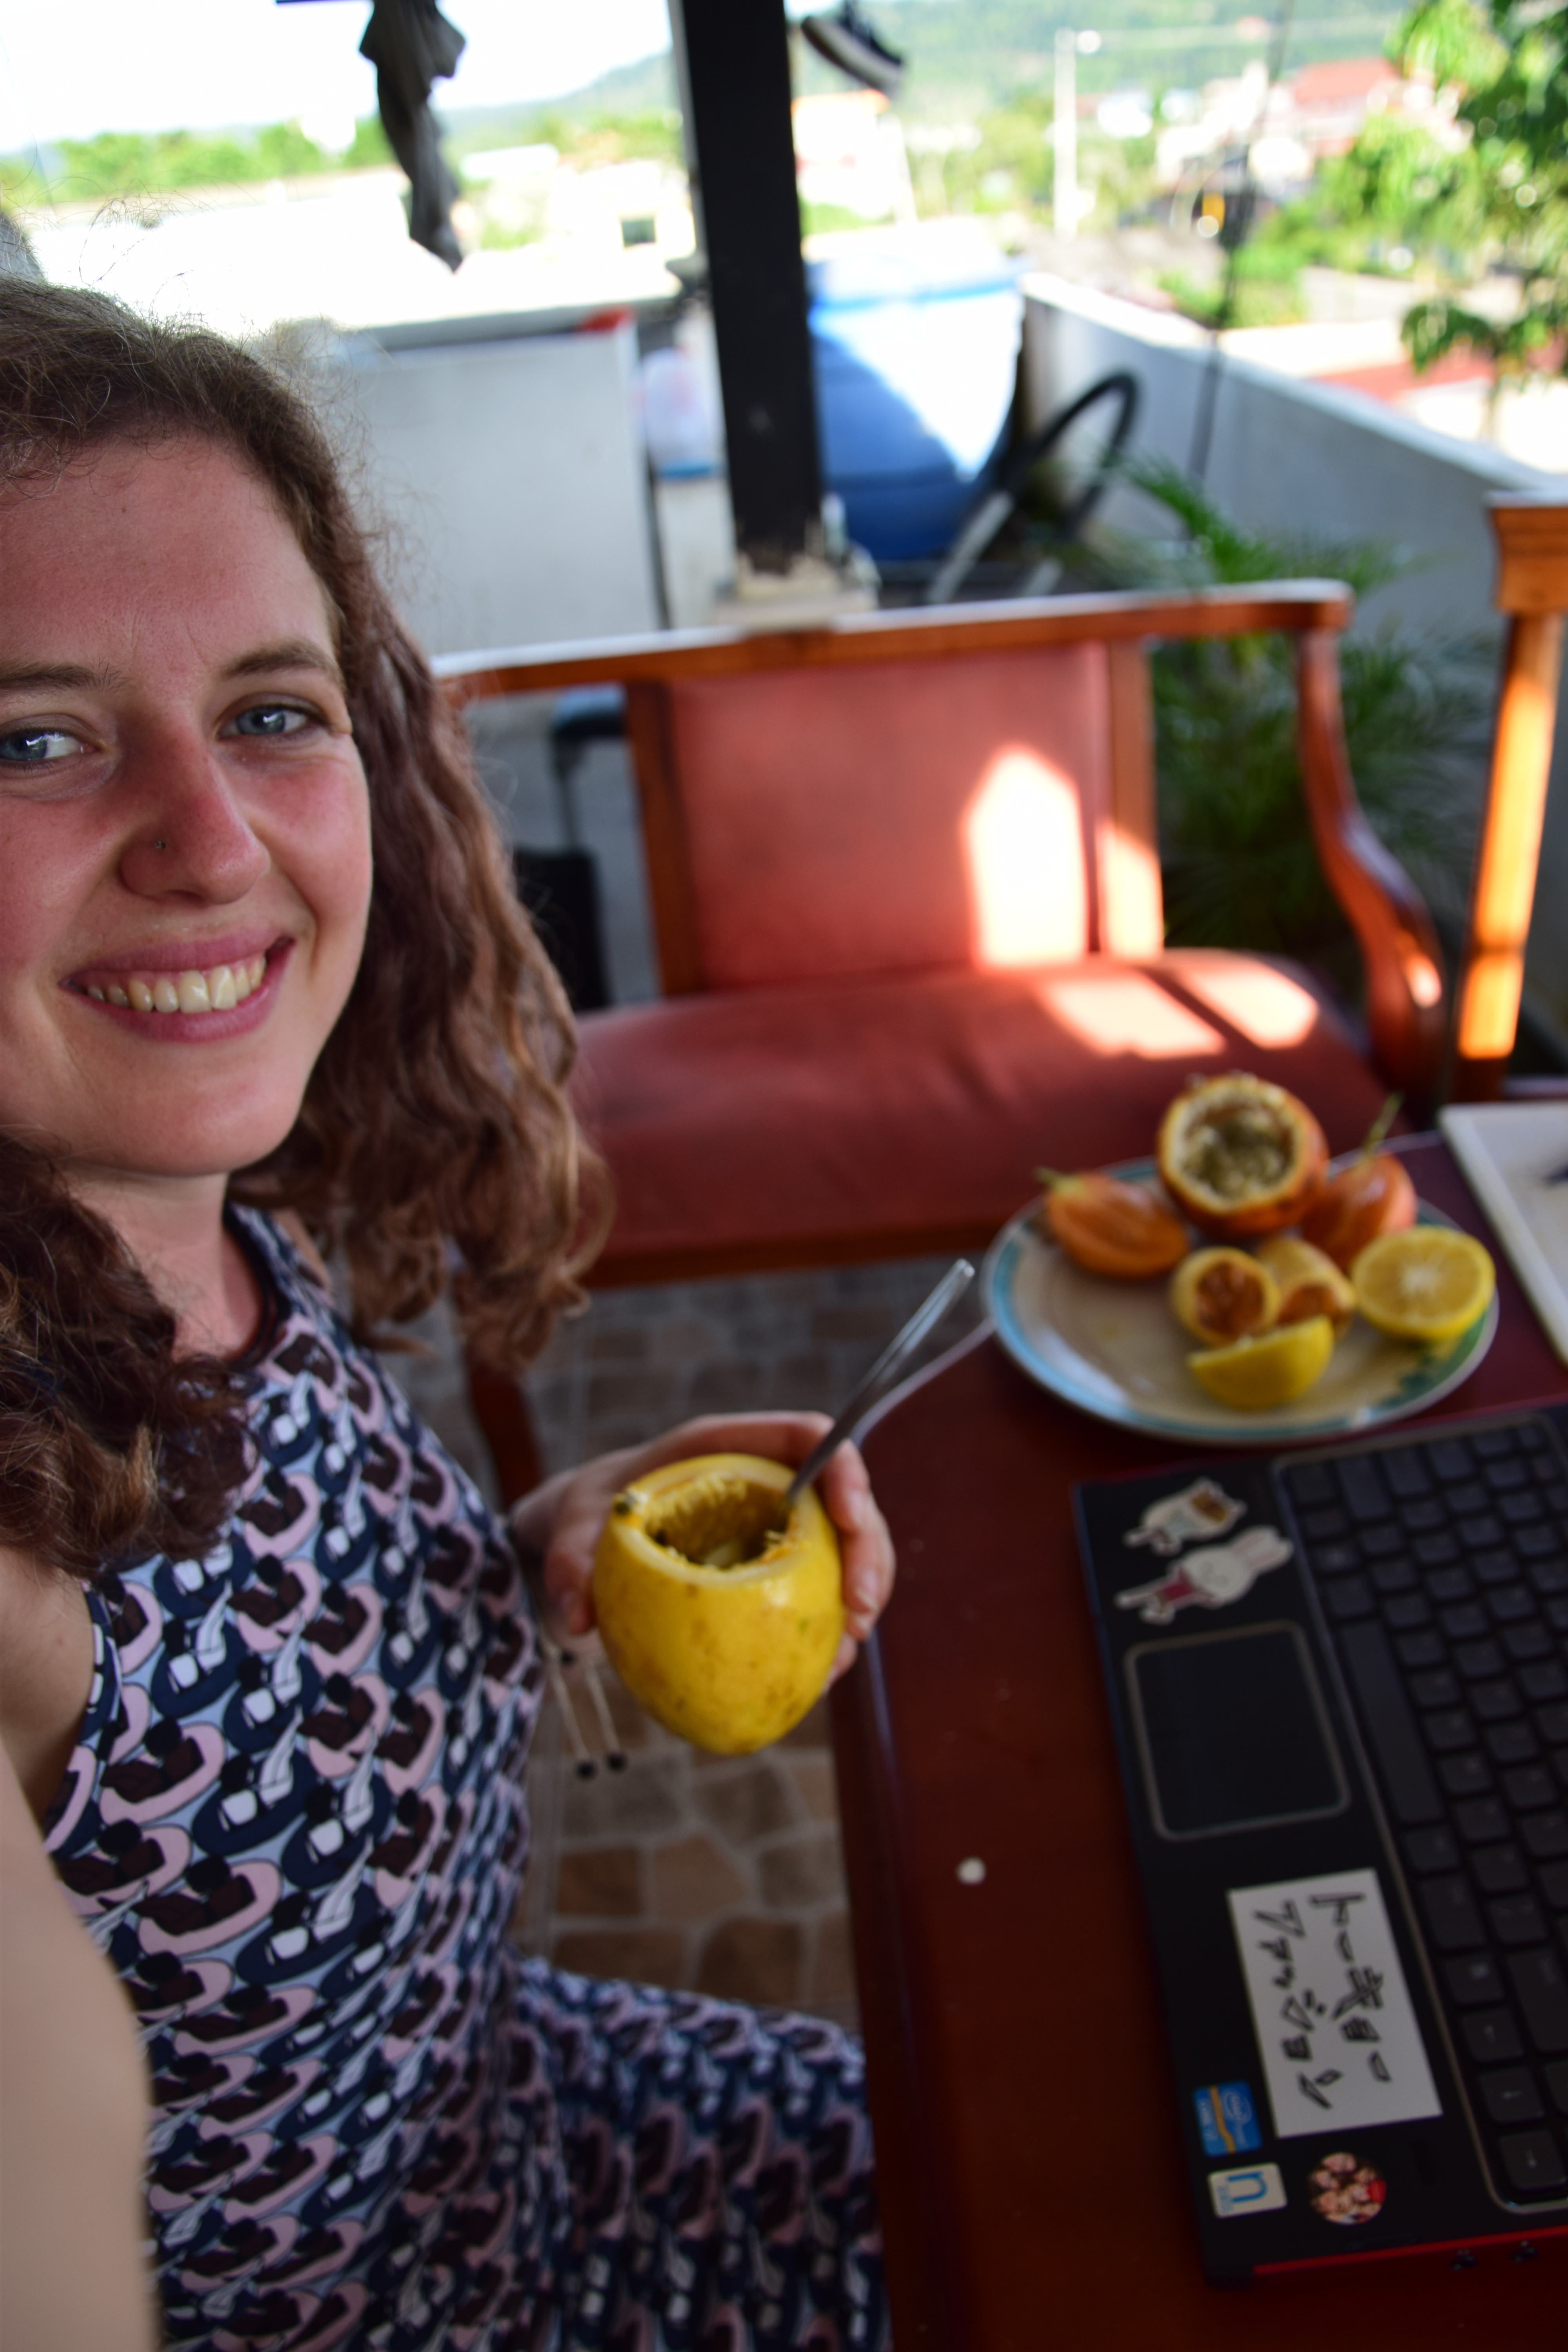
YES! Let’s start with my ultimate favorite; the maracuya. Even though it looks totally different from the purple small passion fruits we get in Europe, it tastes somewhat the same and is a lot bigger (so better! ;)). This one is yellow with sometimes a little bit of green, and feels quite hard on the outside. To find the best ones on the market, I always pick the biggest and heaviest ones! They usually contain the most seeds. To start eating, either cut it through the middle and eat both halves, or take the top side off and use the maracuya as a bowl and just scoop out the inside. Some people prefer to swallow everything without chewing, however, I like the texture of the seeds since it makes it a little bit crunchy so I prefer to chew on it.
Use: mostly used for juices since it’s a very sour fruit. But if you’re like my sisters and I, you’ll probably prefer to eat it like this!
Price: 5/6 for 1 dollar
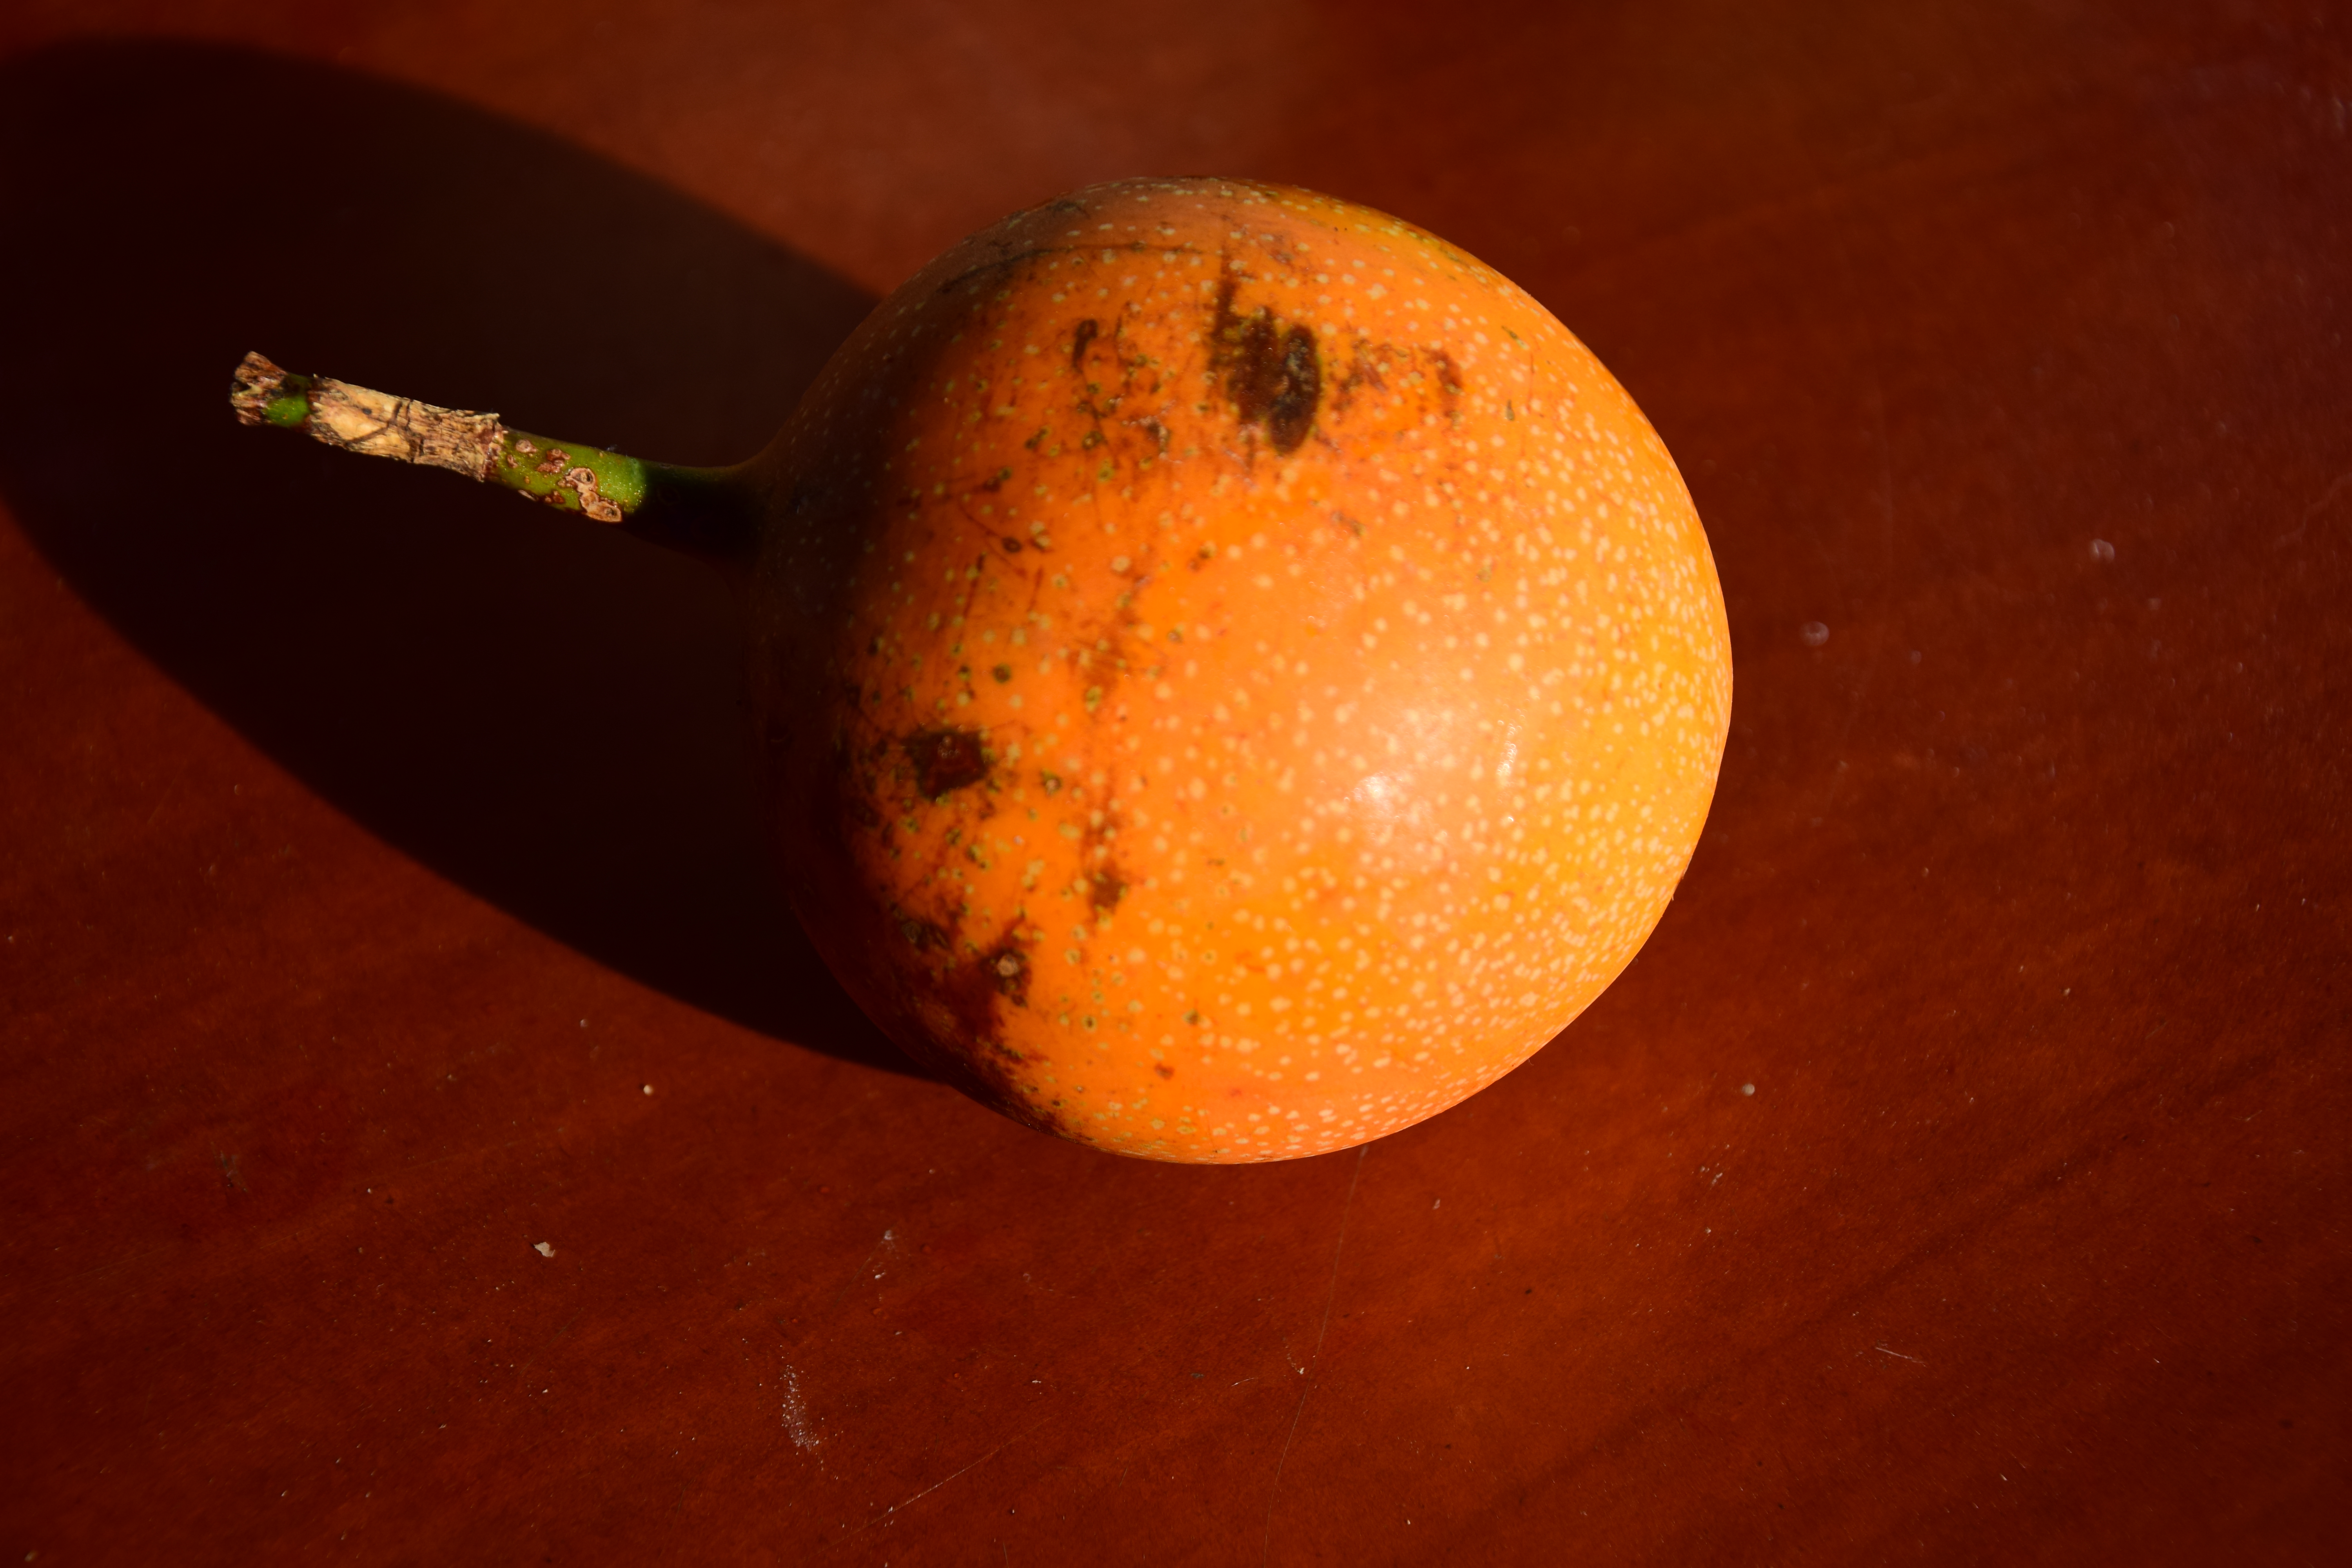
Another passion fruit, yay! It’s an orange fruit with some light brown speckles on it and can be found at most markets. While the maracuya is sour and has a pretty strong flavour, the granadilla is a lot sweeter and the texture is even more like spawn. It might look a bit disgusting at first, but the taste makes up for it. If you like both, but find the granadilla not strong enough (flavour wise) and the maracuya to sour, then do like I do sometimes and mix them together in one of the fruits to get a combination of the two flavours
Use: I think just for eating, and you can put it in some dishes too.
Price: 4/5 for 1 dollar

Yes, there is another one for you, passion frutas lovers! Where the name comes from? Well, I think you can take a guess while looking at the picture. The fruits are usually yellow/orang and quite soft when you touch them. Even though I cut it differently in the picture, I think the best way to cut and eat it is longitudinally. The texture is a little bit more tough (and so are the seeds, better just swallow them) than that of the maracuya and granadilla, and therefore it’s also a little bit more difficult to eat, but the flavour resembles that of the maracuya the most. Again it’s quite sour and it has a tangy taste.
Use: it can be eaten raw (although that is rarely done), but it is mostly used for juices and ice-cream
Price: 5/6 for 1 dollar


Tree tomato is a strange fruit of which I haven’t really figured out how to eat it yet, except for just drinking it as a juice with a lot of sugar. It’s a kind of red-orange fruit that is more oval-shaped than a tomato, but when you open it, you do realize why they call it tomato anyway. When you eat it fresh, the fruit tastes very sour and kind of like a mix between tomato and papaya. I wouldn’t recommend doing this. However, the fruit can be used for juices and desert when boiled and mixed with sugar. In that way it still is a flavour I’m not used to, but it tastes quite good.
Use: Juices/desserts/sauces
Price: 6-8 for 1 dollar

I still haven’t been able to figure out which one is which. While the oranges are quite clear and have a bit of a dirty orange-green look, there are also other oranges that again look different. The same in terms of lemons and limes. There are so many that I can’t even start describing them all. I recommend you just buy and try some to find out for yourself!
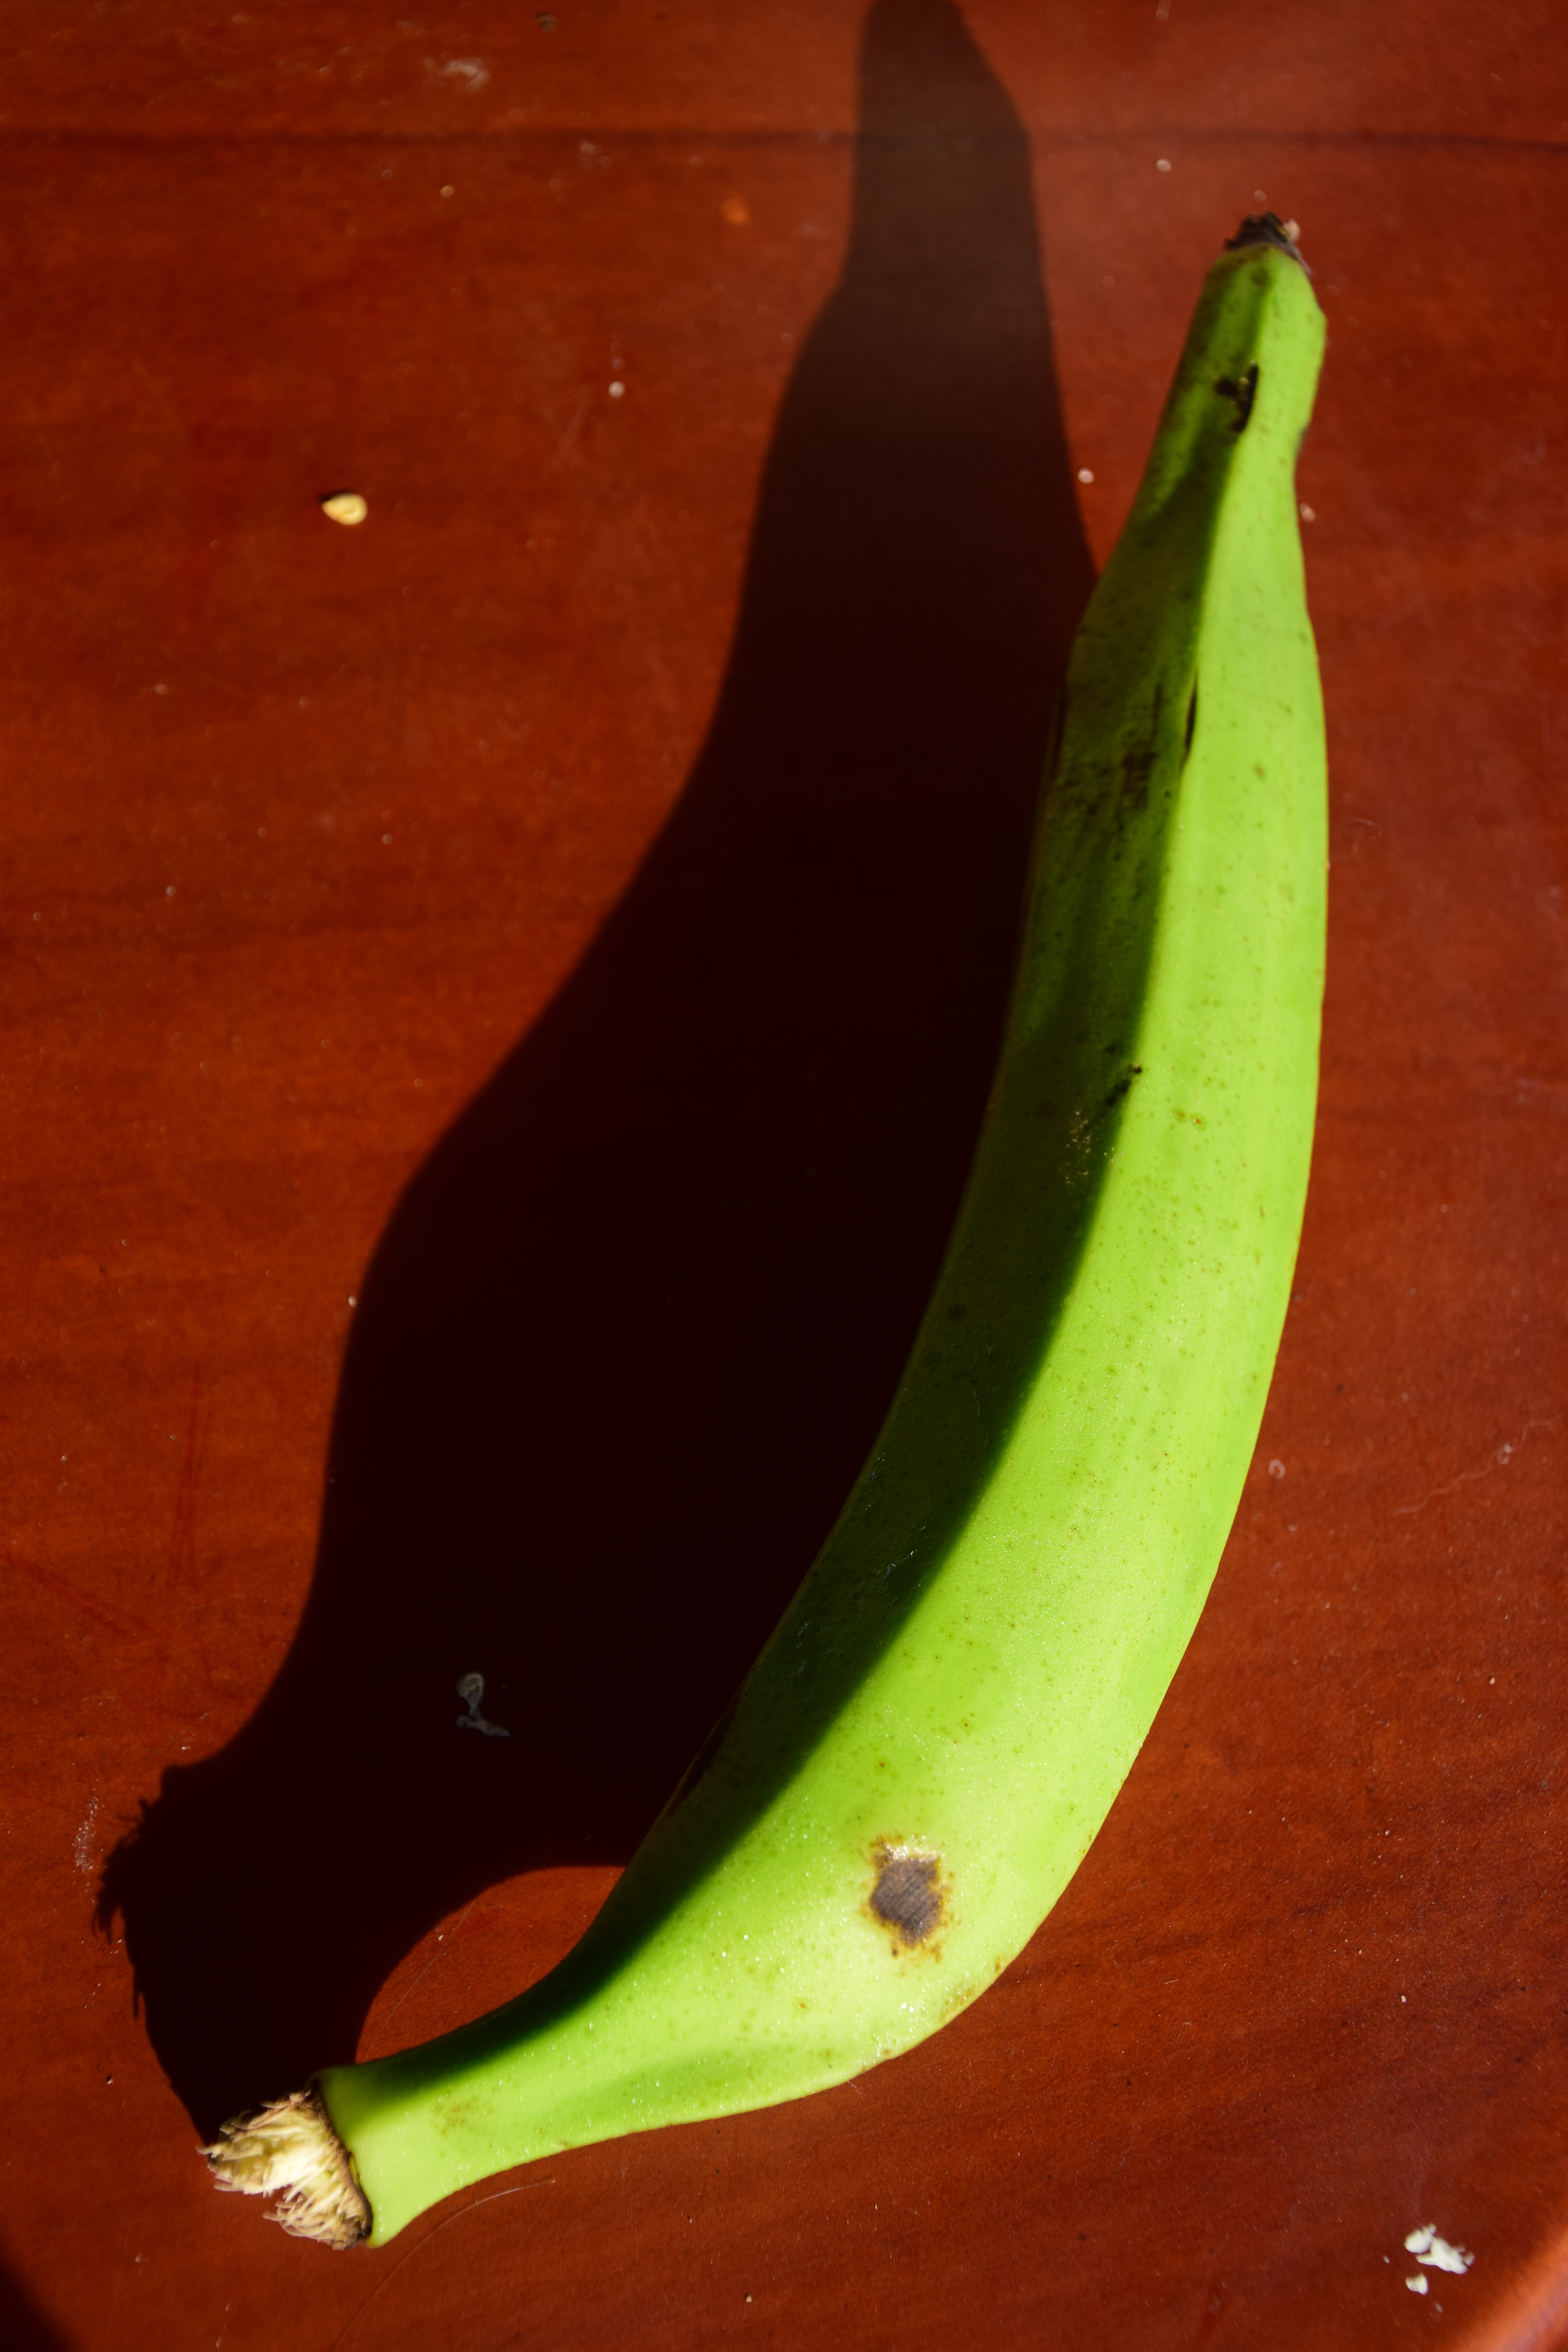
There are several types of bananas in Ecuador (what else would you expect in a tropical country) of which I will describe the most common ones:
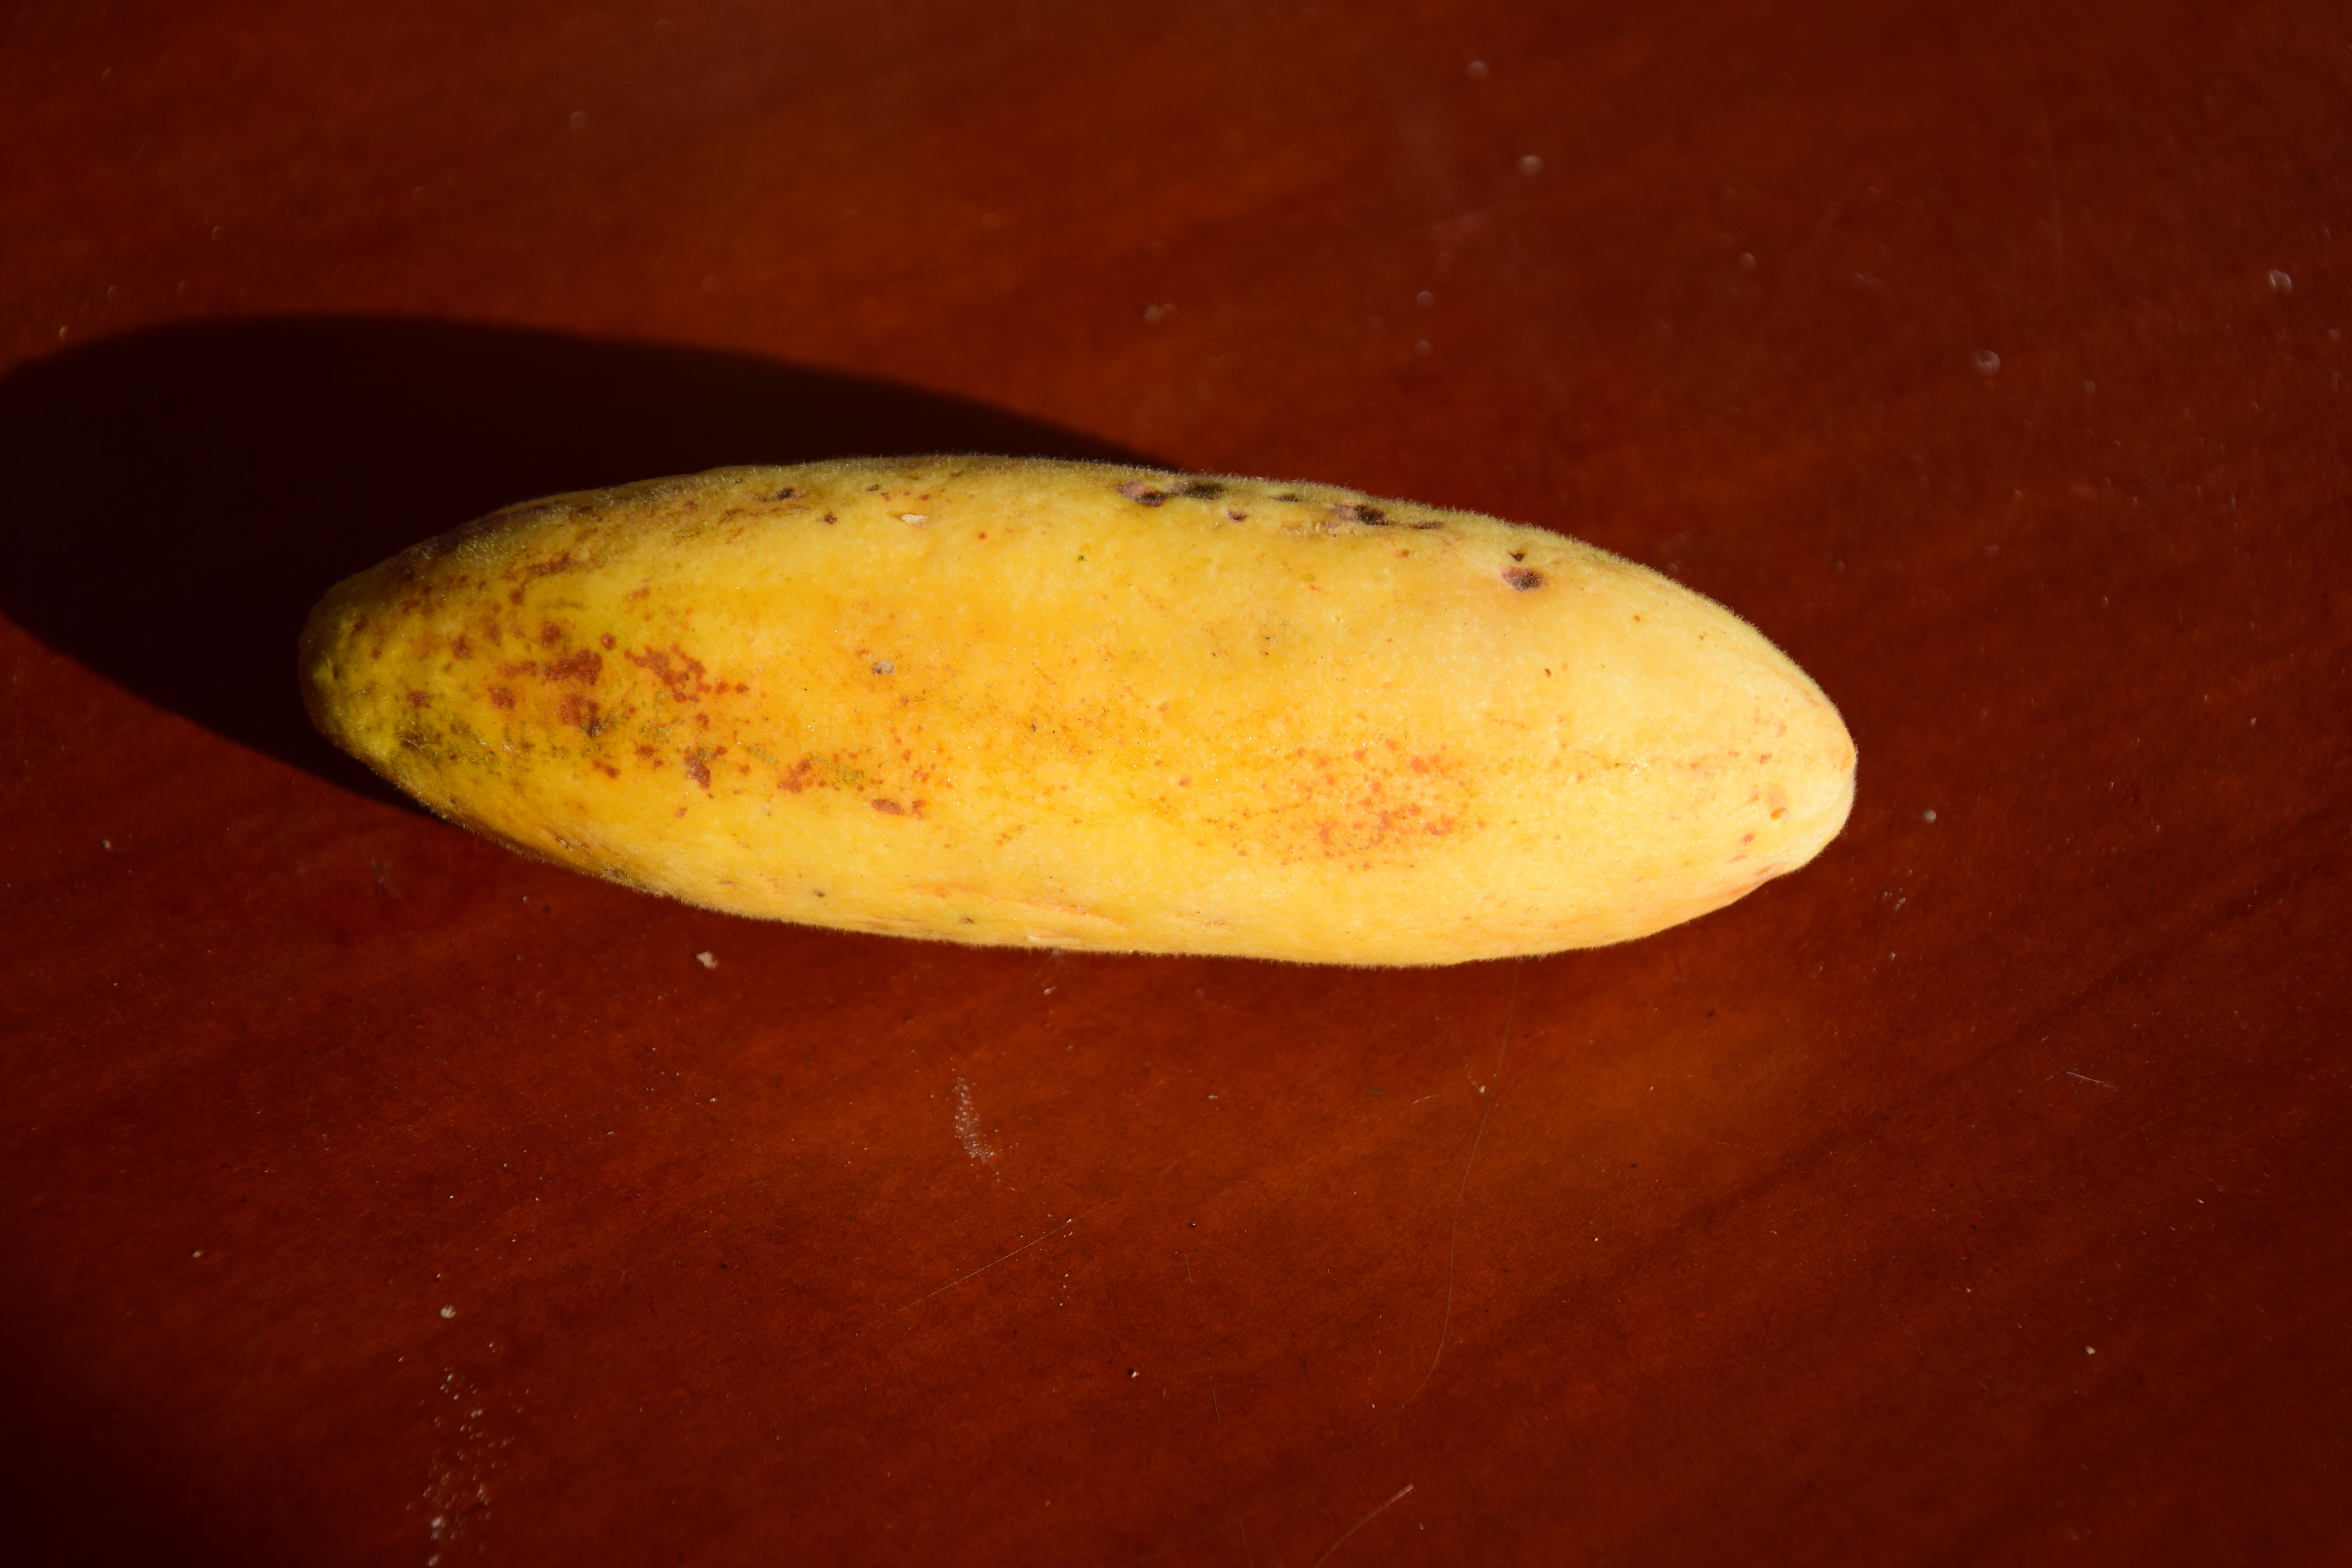
This banana is HUGE and NOT to eat raw. It’s an unripe green plantain with no flavour but it has a great texture for cooking. They go crazy for it here and you can find it everywhere. You can try to prepare it yourself by cooking and baking it, or by making patacones (one of the favorite dishes here), but I recommend you to just go out on the streets and get some ready made, because it’s a lot easier.
Use: Many dishes, but not raw
Price: 8 for 1 dollar
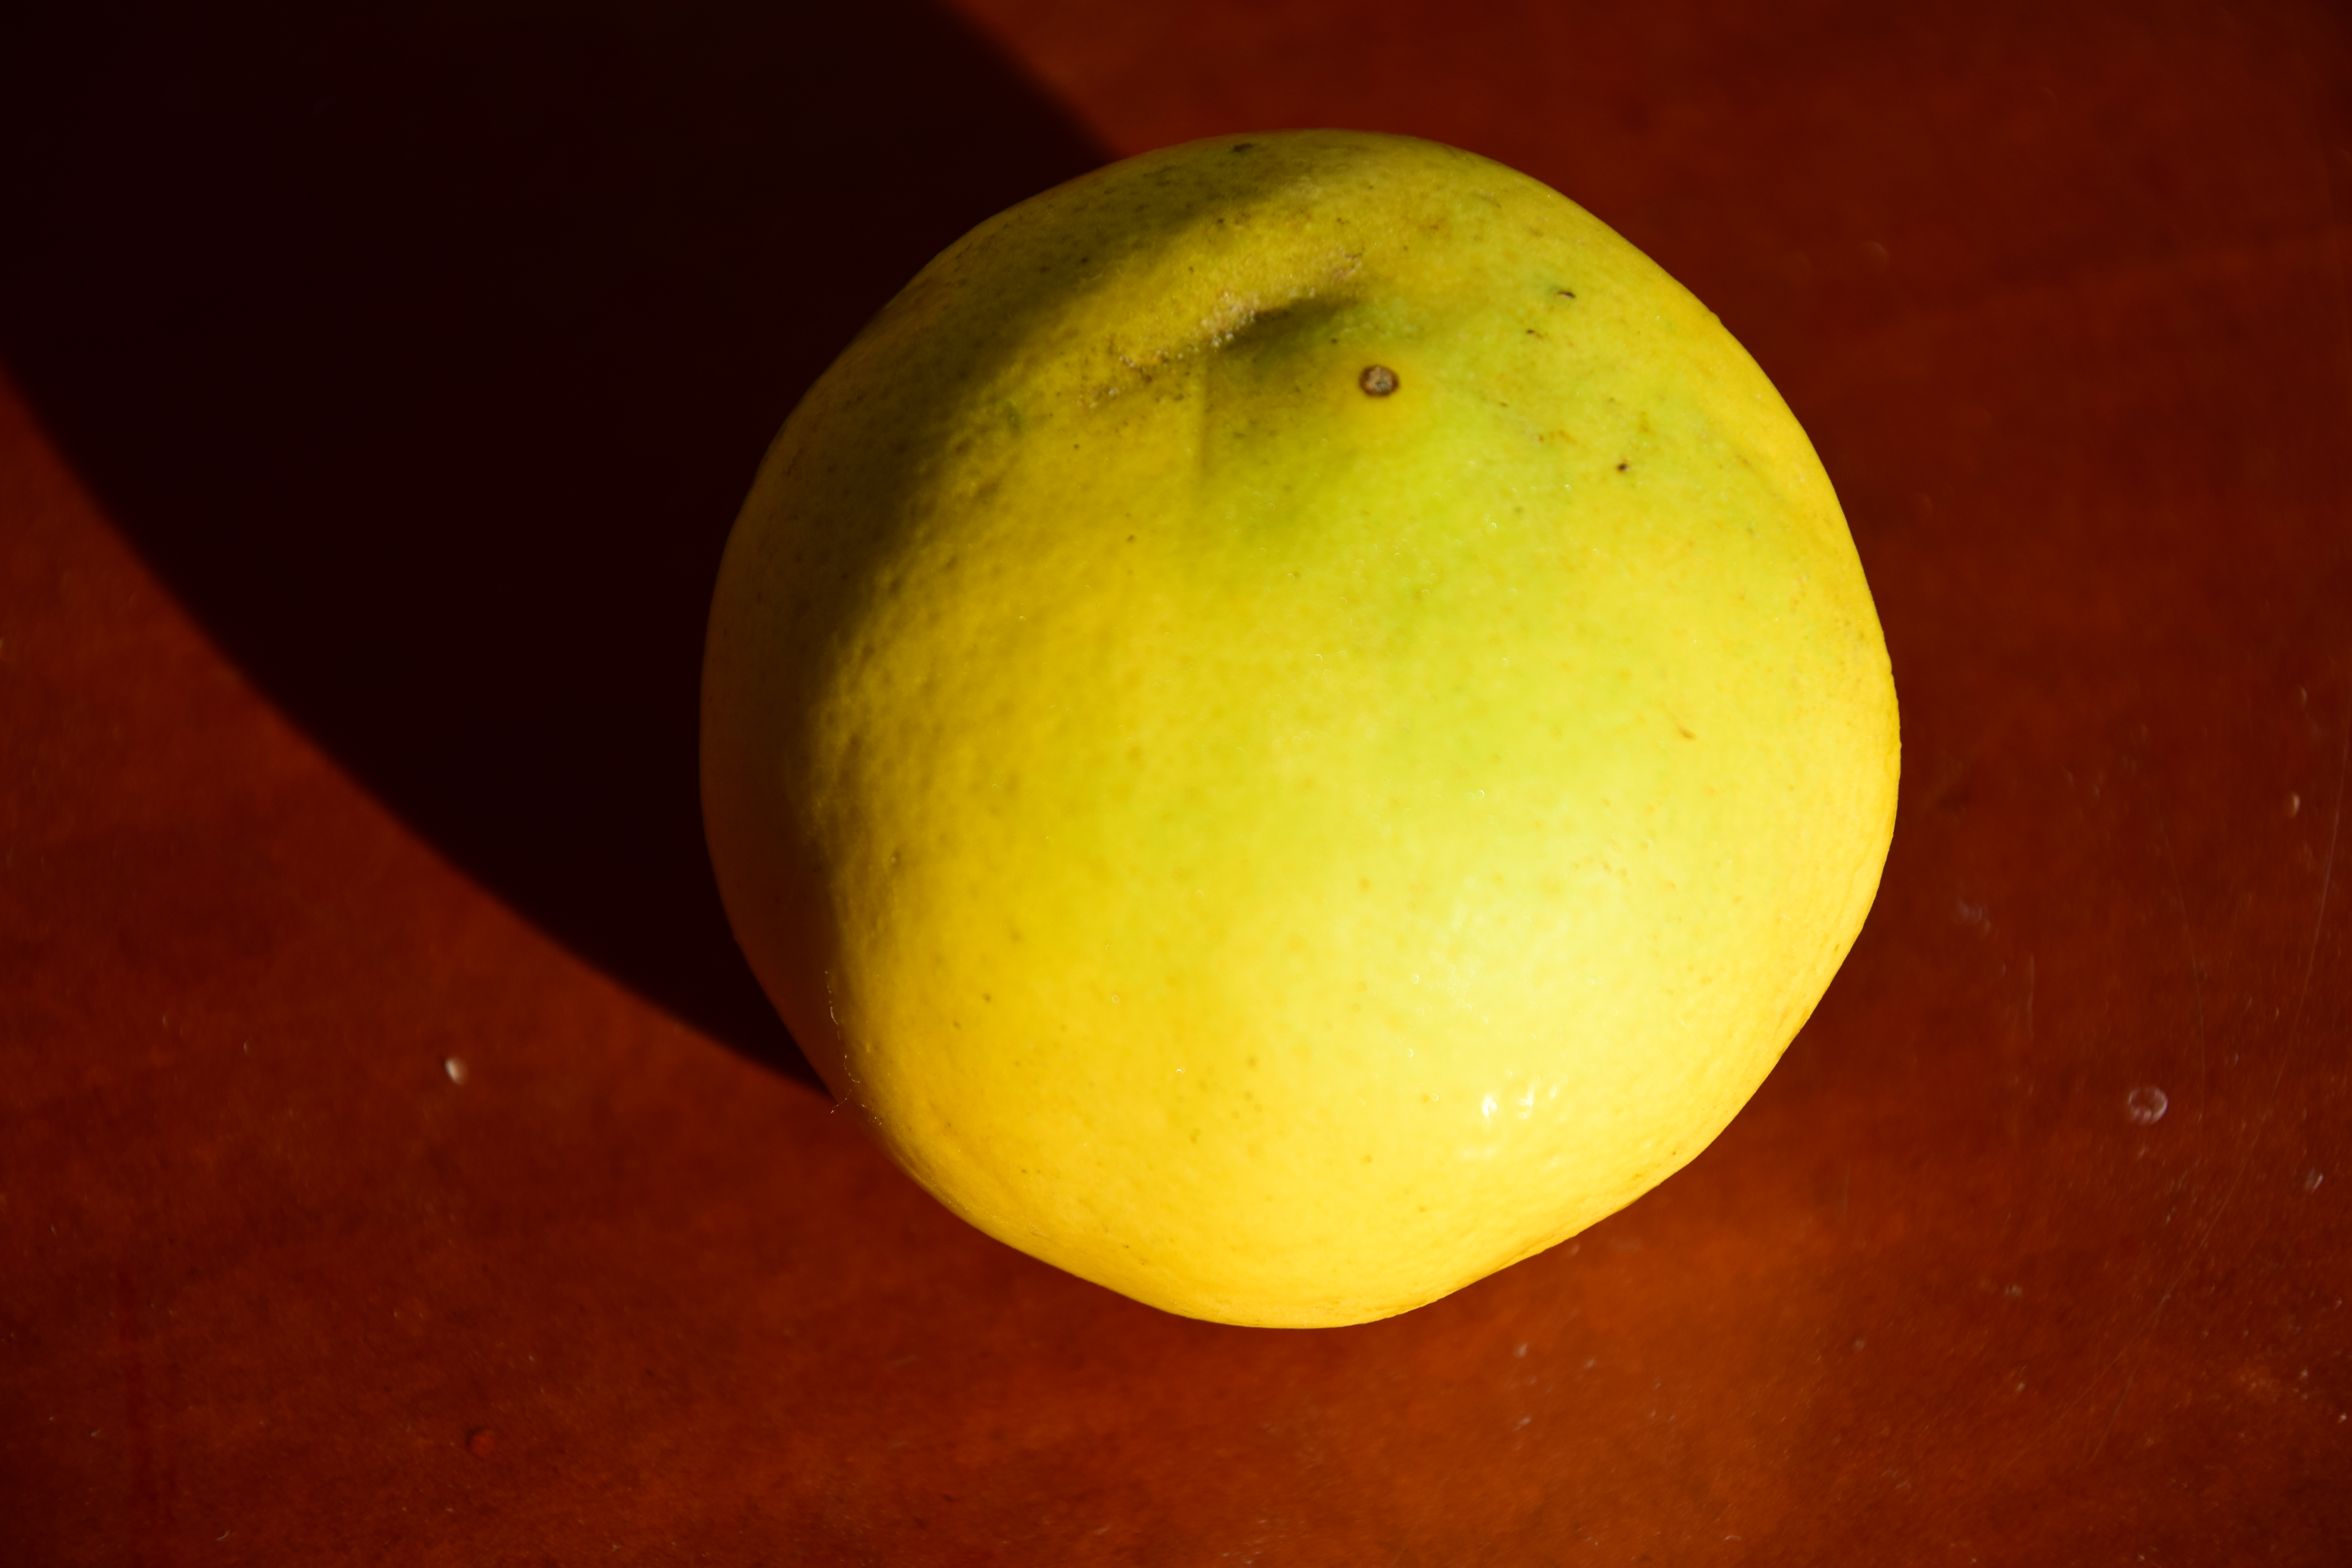
The ripe version of platana verde. Again it’s huge, but this time it has a yellow colour due to the ripening process. Now it’s a lot sweeter, but still not very good to eat raw. They are eaten grilled, from the oven, with cheese, fried and they taste very good. While this one is a bit easier to prepare yourself, I would still recommend to buy it on the streets (you can see people selling them outside from the grill while you walk on the streets), since they know how to prepare it the best.
Use: many dishes but again not raw
Price: 8 for 1 dollar
Orito is a tiny banana (about 1/3rd of a normal one) and contains just as much, if not more, flavour but more concentrated. It’s full of sugar and delicious to eat and the best of all, they are super super cheap. I use them to cook banana bread, or I eat them raw. They contain a lot of sugar though so don’t eat too many or you’ll start bouncing all over the streets.
Use: raw! and I use it for banana bread
Price: depends, but usually a bunch (about 15-20) for 1 dollar
Platano rosado is a banana with a red/purple-ish skin. It's full of antioxidants, beta-carotene and vitamin C and therefore very healthy. Additionally, many more health benefits are attributed to it, although I always remain a bit sceptical. What I know for sure though, is that these bananas are so sweet and delicious. I have eaten the big ones (I heard there are also small ones) and even though it was a bit too much for me at one, since I'm not very fond of bananas, it was soooooo good. So I would really recommend you to eat one if you find them :)
Use: raw, just peal it like a normal banana
Price: Around 5-10 for one dollar
Blackberries in Ecuador are very different from the ones I’m used to in the Netherlands. The ones here are more sour and not very juicy, but they still taste good. They look basically the same, but are a little bit bigger and generally quite ‘expensive’ compared to other fruits.
Use: juices, ice-cream
Price: 2 dollars a pound

Next to these frutas, there are of course many others like mango, pineapple (piña), strawberries (fresas), apples (manzana), watermelons (sandia), grapes (uvas), coconut (coco), guanabana, dragon fruit (pitahaya), prickly pear (tuna), papaya and so on. Maybe I'll describe some of the smaller fruits (tamarindo, some kind of small mango and another thing) which are eaten raw as snacks on the street in one of my next blogs or vlogs so if you want to know about that, make sure to follow me!
I hope this blog helped you to get an idea of Ecuadorian fruits! At least I got to eat all of them while writing this haha. Have fun trying them out too if you get the opportunity!
 Chao! Hannah
- this is a blog adjusted from my personal website https://hannahchanstravels.wordpress.com/2017/09/25/ecuadorian-fruits/ -
Guacamole
Guacamole: easy, quick, delicous, healthy and vegan! Who doesn't love it? You can dip your nachos in it, spread it on toast or put it as a topping on your rice bowl!
Here's how I make mine:
Ingrediënts
Unlike many others, I prefer my guacamole without tomatoes because I feel it can make it to thin/watery sometimes.
That's it! And so easy.
Let me know when you try it! What is your guacamole recipe?
Ready In: 7 min.
Peruvian Lomo Saltado
The first peruvian recipe that I learned how to make is 'Lomo Saltado'. This signature dish consists of meat, rice, fresh patatoe fries and various herbs and spices that are characteristic for the popular Peruvian kitchen. Try it out and discover the rich flavours for yourself!
Preheat the oven at 200 degrees. Clean the patatoes and cut them lengthwise. cover them with a little oil, salt and pepper and bake them in 20 minutes. Boil the rice. Then cut the pepper, onion, chilli (without the seeds), the tomatoe and the garlic in small pieces. Cut the meat into strips, let it marinate for a little while in the soy sauce, vinagre, garlic, chilli and half of the cilantro. After that, bake the marinated meat for a short period on high fire. Add all the vegetables except for the tomatoe and bake for a little more. Finally, add the tomatoe and bake for a few more minutes. Serve together with the rice, fries and top with the cilantro. Buen provecho!
Ready In: 30 min.
Quick and Easy - Ceviche
Ingredients for 4 people :
-700g of White fish (eg. Seabass)
-8 limes
-1 onion
-2 table spoons of evaporated milk
-3-5 table spoons of fish stock (optional but highly recomended)
-Parsley
- you might put chillis if you want to spice things up
Recipe:
1- cut the onion in juliennes (thin stripes)
2- cut the parsley in really small pieces and the chili in circles (remove the seeds so its not too spicy)
3- make sure the fish does not have any bones and remove the skin, then cut it in bite size cubes
4- put the fish in a bowl, add salt and pepper to taste and the juice of all the limes. then mix it all
5- add the parsley, the chilli, the evaporated milk and the fish stock (optional) to the fish and mix
6- let it rest in the fridge for at least 10 minutes before serving
7- put the fish on a plate, then mix the onions with the juice that is left on the bowl and put them on top of the fish
Tip: for a truly peruvian style ceviche, you can put some tosted corn around the fish.
Ready In: 15 min.
Ingredients:
Travelling in Ecuador as a Vegan
As a vegan who loves travelling, you've probably heard that it's impossible to do it if you want to stay healthy. Well, I'm here to change that view and give you some tips for travelling as a vegan in Ecuador.
When I went to Ecuador, I was doubtful about whether I would manage to stay vegan. I had been vegan for a year, and while it was rather easy in the Netherlands, I always thought that I would never be able to keep being vegan while abroad. Nevertheless, I did it with the help of some tips/tricks.
1. Cook yourself
The easiest and best way (if you can use a kitchen) is cooking yourself. There are so many delicious recipes that contain some meat, but it's easy to substitute this meat for beans. Check out the arepas recipe on my page for example. Arepas are totally vegan, and if you combine them with vegetables and beans, very nutritious as well. The plantain recipe is also a very easy recipe for vegans which can be combined with all kinds of things. Basically, you can cook anything you were used to cooking at home as well, just check the ingredients.
2. Eating out? Ask for something specific.
This might sound strange, but it works better than asking "do you have something vegan?" or "can I have this without meat?". These questions often lead to misunderstandings, or even more questions. If you ask for rice with salad, or rice with beans or rice with beans and avocado, you will get it. Of course, in bigger or more international restaurants you might get away with asking for a dish without meat, but if you're at a bus station, or a smaller town or just local restaurants, ask for a specific thing.
3. Look for vegan restaurants
Nowadays many places have some vegan restaurants, or restaurants with vegan options. Especially in the bigger and more touristic places in Ecuador (Cuenca, Quito, Otavalo, Banos, at the coast) you might have a chance of finding vegan things. For a start, in Tena, where I stayed for 3 months, is a great vegan restaurant next to Cafe Tortuga (which also has some vegan options). It is owned by a wonderful cheff and she makes just great dishes! In Baños there is a restaurant called Healthy Food which you can't find on Google Maps, but it is near Ponche Suizo and they have many vegetarian and Vegan options. Also in Baños is Zumo, a great restaurant at which they offer all kinds of dishes, also vegan, and if you ask they might even be able to make some adjustments to the non vegan dishes. But since Ecuador is a popular travel destination, you can find many options nowadays at more international restaurants.


Food at Zumo Vegan Streetfood
Hopefully, this can encourage you and aid you in your vegan travels! Also in the rest of South America! Let me know if you have any more recommendations :)
Cheers,
Hannah
 Recipes from around the world - Bundle
 Hungarian Street Food: Lángos
This deep fried flatbread is a common street food in Hungary where it is served warm with sour cream and grated cheese, rubbed with garlic or garlic butter, or doused with garlic water.
Instructions
Ready In: 55 min.
Ingredients:
Polish potato pancakes
Using the coarse side of a box grater, grate the potatoes and place them into a sieve or colander over a bowl. Using the finer side of the grater, grate the onion and add it to the potato. Using the back of a spoon, or even your hands, squeeze out any excess water/juice from the potatoes and onion. Discard the liquid, and then put the onions and potatoes into the bowl. Add the egg, two tablespoons of flour and season with sea salt and pepper, then stir everything together – the mixture should be quite thick.
Heat a little vegetable oil in a large, flat frying pan. Drop three or four mounds of the mixture into hot oil, and flatten to make small pancakes.
Fry for 2-3 minutes per side, turning once, until golden brown. Transfer the pancakes to a plate lined with a paper towel. Repeat until all the potato mixture is used, adding a little fresh oil if necessary. You can serve the pancakes immediately, or keep them warm, wrapped in tin foil in a low oven.
To make a quick mushroom sauce to serve with the pancakes, heat a little oil in a clean frying pan. Fry the chopped onion on a low heat for ten minutes until golden and soft. Add the mushrooms and cook for a further few minutes, until soft. Pour in the stock and simmer for one minute, then pour in the double cream and stir in the sour cream. Allow to bubble and simmer, then serve with the potato pancakes, along with some fresh dill and extra sour cream on the side.
Smacznego!
Ready In: 25 min.
Ingredients:
Sarmale Recipe - Romania
Recipe for Sarmale (Stuffed cabage rolls)
Ingredients:
How to prepare:
Tips:
Ready In: 350 min.
Romanian Traditions & Foods
Holidays & religion
Romania is a country where most of the population is following the orthodox-christian religion. The orthodox religion is derived from Christianity but is much stricter in some ways like fasting without any animal product (milk, eggs, butter), church service takes about 4 hours on a Sunday instead of the hour and a half like in the catholic church. Romania knows multiple holidays that are comparable with the western holidays and some that are just celebrated by Romanians.
New Years eve (Revelion)
New years eve or Revelion as it is known in Romania is a very important holiday and is the first holiday celebrated in Romania. The celebration of new years eve dates back to 2000 years before Christ. During the celebration the Romanian people give each other symbolic gifts, like sweets and honey as a sign of peace, money and gold as a sign of welfare or a lantern for a year full of light.
New Years day (Anul nou)
In the cities New Years day is being celebrated by having people over at home or go out to bars, pubs and continue the party that New Years Eve offered. However the date of New Years day corresponds with the celebration of saint Vasile the great (Sfantul Vasile). In the countryside this is being celebrated on the first day of the year. On this day children will go out caroling a carol called Socrova. With the carol they wish everyone a rich, fruitfull year.
Christmas (Craciun)
During Christmas the Romanians prepare the Christmas tree with beautiful ornaments, just like in most countries Christmas day is spent with family and friends. The celebration is in name of Jesus Christ who was born on Christmas. In addition to the usual tree ornamenting, gifting to others and gathering of friends and family the Romanians also go door to door and carol for sweets, fruit or money. This is mostly being done by children who have been practicing weeks beforehand to impress the people.
Martisor
In Romania on the first of march there is a celebration named Martisor (literally translated; small march). The men give woman a gift consisting of a red and white thread or a more expensive version is a piece of jewellery with the red and white thread involved in the appearance. After the woman received the gift from a man they will wear this accessory until the end of March. This tradition symbolizes the beginning of spring and it is believed to bring strength and health during the coming year. 
Easter (Pastele)
Easter is being celebrated on a different date than when the Christens and Catholics are celebrating the rise of Christ. Eastern is being celebrated after ‘the seven weeks of fasting’. During this time it is prohibited to eat any animal related food. This includes butter, milk, eggs and fish. During the last night of fasting everybody wakes up around midnight, washes themselves put on clean (usually new cloths) and heads towards the church. At the church there will be a ceremony where the priest will, with a cross and a lit candle in his hands, come out of the church followed by all the believers. The priest will then shout:
‘’Christos a inviat’’, meaning christ has risen, To which everybody will respond with: ‘’Adevarat a inviat’’, meaning he really has. The fire from the candle the priest brought out is being used to light everyones candles. After which everyone will return to there homes with the lit up candle by the church its flames. When arriving home instead of going to sleep, everybody sits down at the table and has the first meal in seven weeks that consists of animal products.
Bear parade
When winter is nearing its end there is another unique tradition exclusive to Romania known as the bear parade. During this period there will be a parade of dancing bears which stand for bringing luck . The participants dress themselves with real bear hides and go door-to-door while growling and accompanied by percussion and singing to wear off all the evil.
Romanian traditional foods
Cozonac
This type of cake has been made for years and is a very old tradition in Romania. It is being said that the Cozonac is originated from ancient Egypt and then taken over by the Greek. Eventually it found its way to Romania. It is being made for special occasions like Christmas or easter but its also being enjoyed on a wedding day. Its made by using flower, eggs, milk, butter, salt and sugar. Optional ingredients that are used quite often are: resins, orange or lemon zest, walnuts, vanilla or rum extract, cocoa powder and poppy seeds.

Mamaliga
Mamaliga is a often made supplementary dish by Romanians. The dish consists of a type of corn porridge that is eaten with some type of meat (usually pig) and cheese mixed with yoghurt. Mamaliga was is known to be a replacement for bread for people who could not afford bread. During the passing of time it changed to a nostalgic food for many Romanians and is being eaten on the regular by all Romanians.
Mici (Mititei)
Mici are meat rolls usually consisting of a mix from pig-, cow- and chicken meat. This is a tradition Romanian dish that is made on a barbeque and is mostly eaten with a piece of bead and some mustard.
Sarmale
Sarmale is arguably the most iconic Romanian dish. The dish can be described as cabbage rolls stuffed with different types of meat or rice. In addition to the meat or the rice there are herbs added, onions and in some cases traditional (smoked) bacon (usually with rice). The dish is often served with mamaliga (corn porridge) and yoghurt to bring down the intensity of the overpowering flavour given by the sarmale. The dish is being eaten on all the holidays and on wedding days. Sarmale is a delicious dish especially when it is home cooked with the right ingredients. Many Romanians prepare for the winter by pickling cabbages so it can be used during the winter to make Sarmale.

Scotch Eggs
Hello everyone,
On my trip to great England i had the one of the best pub foods. Pub food is fast easy, simple and doesn't require to much effort. Today i wan't to share my version of scotch eggs, i've been making them since i left England and the are delicious.
Prep Time: 10 mins
Cook time: 15 mins
Instructions
Boil all your eggs for 2-4 mins (Depening on the heat). You wan't the eggs to be cooked on the outside and liquid in the center (Yellow). Once you're eggs are done take them out and pout cold water over them for 20 seconds. This is to stop the egg from cooking any further.
Preheat your deep fryer to 350.
Meanwhile wrap your hard boiled eggs in your pork sausage.
In 3 separate bowls add your eggs, flour and bread crumbs,
Dredge your wrapped eggs first into the flour, then eggs then bread crumbs.
Fry 2 at a time in deep fryer for about 5-6 minutes or until internal temperature is 160.
Remove cooked eggs and serve
Serve with honey mustard or your favorite dipping sauce (Mayo, Ketchup, BBQ hot sauce) or make ur own.

Ready In: 20 min.
Ingredients:
Recepten uit Europa en Europese eetgewoontes: blogs en bijdragen van WorldSupporters  Recipes from around the world - Bundle Kenyan chapati
Serves nice with beanstew, potatoe stew, meatstew but my alltime favorite lentilstew!
Ready In: 120 min.
Ingredients:
Ndole - Cameroon
Een authentiek recept wat veel wordt gegeten in Kameroen, heerlijk.
Ready In: 70 min.
Ugandan vegetable Samosas
This recipe is from: blog.ssekodesigns.com
I didn't try to make them myself yet, but i ate lots of Samosas in Uganda and they absolutely were my favourite Ugandan food!!
Preheat the oven to 400 degrees F.
Heat the oil in a small nonstick pan. Add the mustard seeds and fry for about ten seconds, or until they begin to splutter.
Add the onion and ginger, and cook for 2 to 3 minutes over a high heat. Add the peas, and stir well. Add the coriander, cumin, chile powder, garam masala, salt to taste, and a splash of water. Cook for 1 to 2 minutes, and then add the potatoes, and cilantro, and cook for another 2 to 3 minutes. Taste the mixture and adjust the seasoning as necessary.
Unroll the phyllo pastry dough, cover with plastic wrap and a damp tea or kitchen towel. Peel off one sheet and keep the rest covered so that it doesn't dry out. Lay the pastry sheet flat on a clean surface, and brush with melted butter. Fold in one third of the pastry lengthwise towards the middle. Brush again with the butter and fold in the other side to make a long triple-layered strip.
Place one rounded teaspoon of the filling mixture at one end of the strip, leaving a 1-inch border. Take the right corner and fold diagonally to the left, enclosing the filling and forming a triangle. Fold again along the upper crease of the triangle. Keep folding in this way until you reach the end of the strip. Brush the outer surface with more butter. Place the triangle onto a baking sheet and cover while you make the rest of the samosas. Bake in the center of the oven for 30 to 35 minutes, or until golden and crisp, turning halfway through the cooking time.
Enjoy!
Ready in: 50 min.
Ingredients:
Recepten uit Afrika of met een Afrikaanse twist van WorldSupporters - Bundel Recipes from around the world - Bundle
 Asian food
A natural plate for natural food (photo from the Philippines)
Instead of poke bowls, I am making poke plates (so you can still use the banana leaf real fusion)
Pad See Ew - Thai noodle dish
In Thailand you can find the popular Pad Thai on every street corner. Pad See Ew is a bit less well-known, but evenly delicious. It is a simple noodle dish, recognisable by the wide and thin rice noodles that are being used. If you can't find the wide noodles, you can also use another type of noodles.
Recipe:
Ready In: 30 min.
Ingredients:
Pad Thai
1. Heat the oil in the wok, add garlic, shallot, chicken, tofu.
2. Add radish, follow with dried shrimp. Stir to combine.
3. Put egg down let them cook then scramble it and mix it well with other ingredient.
4. Pull everything up to one side of the wok, and then pour chicken stalk or water.
5. Put rice noodle then stir well then add sauce to combine until it cook.
6. Finally, add bean sprouts and chive down mix it well. Finish and ready to serve.
Serve with:
- Roasted peanuts
- Chili powder
- Lime
- Sugar
Succes!!
Ready In: 30 min.
Ingredients:
Spicy Korean ramen (vegan)
I absolutely LOVE ramen. It's one of my favorite dishes in Japan, and fortunately more and more vegan ramen places are popping up in the country. While ramen has its roots in China, because of the use of Chinese noodles, the Japanese have turned it into their own traditional dish. Originally the base of the dish consists of Chinese wheat noodles often in a meat or fish broth, but many variations exist throughout the country such as the famous Hakata ramen from Fukuoka, a milky ramen soup made from pork bones. Other popular, and vegetarian, variations of ramen are Shoyu (soy sauce), Shio (salt) and Miso ramen. As toppings, many ingredients can be used. Often used vegetarian toppings are green onions, boiled eggs, bean sprouts, fermented bamboo shoots, nori (dried seaweed), corn, shiitake and wakame.
Since I was craving spicy food while walking around in our local Asian supermarket, I decided to make my own spicy ramen noodles. I already made miso ramen a couple of weeks ago and while I love it, miso and japanese spicy don't go too well together in my opinion. So I had to think of something new. One thing I'm hooked on is the Korean Gochujang (red chili paste) which is great for bibimbap or spicy Korean rice cakes for example. Since I don't use it too often, one box of paste can last in my fridge for over 6 months, so why not create some more dishes with it!? It probably tastes great as a ramen broth too, right? So I got my veggies and wheat noodles and went home to cook some delicious ramen. I can tell you, it took me by surprise how amazingly tasty (and spicy!) it was :).
1. Cut the tofu into cubes and add the hoisin sauce, soy sauce, a bit of garlic (powder) and oil to it. Stir and let it sit for a while
2. Cut onion and garlic into tiny pieces and fried the onions for a couple of minutes before I added the garlic.
3. Add half a can of diced tomatoes and let it simmer for about a minute.
4. Add the dried shiitake mushrooms and the vegetable stock (don't add too much water since you don't need a huge amount of soup)
5. Combine the gochujang with the soysauce and hoisin (and some broth to make it easier to mix) and add to the broth. Add more soy sauce and/or salt if needed. And more gochujang if you want it more spicy! :)
6. Let it simmer for a while, while you cut the toppings and fry the tofu.
7. Now add the noodles to the broth and cook until done (follow the instructions on the package).
8. Put the noodles into a both, cover it with some broth and top with all your amazing toppings! For garnishing you can use some sesame seeds.
Enjoy! :)
Ready In: 30 min.
Ingredients:
Recipes from the Philippines or with a Filipino twist - Bundle Recipes from Indonesia or with a indonesian twist by WorldSupporters - Bundle
 Recipes from around the world - Bundle Indian chapati recipy
What to do when in Diu? Borrow the flat pan from the hostel buy some flour and pick a nice spot for a campfire where you make your own chapati!
Fair is fair the local indian chapatis were way better, or to speak in Indian terms: Same, same but different.
Back in Europe though, these Indian wraps win the taste contest by far with the ones you can buy in the stores. If you can even find them in your local store.
INSTRUCTIONS
…and ready to serve with a delicious curry… Enjoy!
Ready In: 90 min.
Ingredients:
Kenyan chapati
Serves nice with beanstew, potatoe stew, meatstew but my alltime favorite lentilstew!
Ready In: 120 min.
Ingredients:
Chapati tijd!
Voor mijn familie heb ik chapati's gemaakt. In Afrika heb ik dit vaak gegeten. Dit zijn een soort wrapjes die je eet bij een curry of bij groenten. Chapati's heb ik leren maken door lokale mama's uit het dorp. Het is heel simpel, vooral goedkoop, vullend en verslavend.
Kneed alle ingredienten door elkaar, het is de bedoeling dat de chapati's luchtig worden. Hoe langer je kneed, hoe beter dat zal lukken. Zorg ervoor dat het deegje niet te soppig wordt, het deeg hoort redelijk stevig te zijn. Als je tevreden bent met je deeg verdeel je het deeg in 10-15 bolletjes. Deze laat je even rusten. Zo'n half uur is genoeg. Daarna rol je de bolletjes uit met de deegroller. Rol niet over de randen maar tot de randen, zo behoud je de lucht in het deeg. Als ze zijn uitgerold tot 1mm kan je ze bakken. Bak ze een paar minuten aan beide zijden en gebruik hiervoor geen olie!
Chapati's kunnen warm en koud gegeten worden en zijn lekker bij een curry, maar zoals je zult merken: degene die je overhoud zijn ook heerlijk op zichzelf :)
Ready In: 0 min.
Ingredients:
Chapati!!Dit recept heb ik geleerd van mijn host moeder ik kenia.
Het is het recept voor Chapati!! IK ben erg benieuwd of het jullie lukt!!
Meng alle benodigdheden door elkaar heen en maak hier een stevige massa van. Als het deeg een egale stevige massa is masseer het deeg dan nog zo voor 10 minuten. Rol het deeg uit met een dikte van 0,5 cm in een vierkant. Smeer de vierkant in met olie en snijd het vierkant verticaal af. Elke plak moet zo een 10 cm breed zijn en zo een 20 a 30 cm lang. Mak van deze plakken rolletjes en les ze even weg.
Na 15 min rusten rol je de rolletjes uit met een deegroller en maak er een mooi pannenkoekje van. Zet een pan op het vuur en doe er flink wat olie in. Als de plan heet is leg je de pannenkoekjes er om en om in. Eerst elke zijde tot ze gebakken zijn daarna smeer je elke pannenkoek in met olie om ze een knapperig laagje te geven.
Dit recept kan met van alles geserveerd worden het lekkerst is met groenteprutje. Zoals bonen of linzen
Ready In: 60 min.
Ingredients:
Chapati brood als pizza bodem.
In Nepal heb ik geleerd chapati/roti te maken, maar met een westerse touch creeër je een heerlijke pizza.
Maak de chapati door de bloem in een kom te doen en langzaam water toe te voegen. Kneed dit tegelijkertijd en zorg dat je een droge niet plakkerige bal overhoud. Hier maak je platte pannekoekjes van en deze bak je met een beetje olie even in de pan. Druk met een theedoek hard op de randjes tijdens het bakken, dan wordt het wat luchtiger. Op het eind beleg je het naar eigen smaak en doe je het 10 minuten in de oven.
Ready In: 30 min.
Ingredients:
Recipes from around the world - Bundle Fijian Cassava cake
Mix all ingredients in a large bowl. Pour into greased 9x9 pan. Bake at 400 degrees for 40-50 minutes or until brown on top and tester comes out clean.
If you have cassava root, grate it in a food processor and boil it for about 5 minutes to be able to use it in the recipe.
Enjoy with afternoon or morning tea!
Ready In: 60 min.
Ingredients:
Australian warm Barramundi salad
This easy dish is not only delicious, but also very fast to prepare. This is how you make it:
Step 1
Season barramundi with salt for 5 minutes before cooking. Heat a large pan over medium heat. Add 2 tbsp olive oil before adding barramundi skin-side down. Press fillets flat onto pan for about 4 minutes until skin is crisp. Turn and cook for about 1-2 minutes until just cooked through. Remove and place on warm plates, skin-side up.
Step 2
To make the warm dressing, add remaining olive oil to the pan with olives, preserved lemon, cherry tomatoes and capers. As soon as the cherry tomatoes soften and release their juices, add the basil leaves and toss well.
Step 3
Place barramundi on individual plates and spoon warm tomato dressing over top. Scatter with pepper and rocket leaves. Squeeze lemon juice over top and serve.
Ready In: 20 min.
Ingredients:
Vanuatu Lap LapLap Lap is considered to be the national dish of Vanuatu. This dish is usually prepared for special occasions on the island.
Ready In: 90 min.
Ingredients:
Kokospavlovas met Exotisch Fruit ")
Pavlova is in Nieuw-Zeeland een favoriet dessert. Traditioneel wordt het daar geserveerd met slagroom, kiwi en passievruchten. Het basis pavlovamengsel kan op smaak worden gebracht met gemalen amandelen, hazelnoten, koffie, cacao of kokos.
Verwarm de oven voor op 120 graden. Klop in een schone kom de eiwitten en het zout met de mixer tot zachte pieken. Voeg al kloppend langzaam de suiker toe. Klop het mengsel +/- 10 min. tot het glanst en heel dik is. Klop de maizena en azijn erdoor en spatel er dan de kokos door. Schep met een grote lepel 8 hoge scheppen eiwit op de bakplaat. Draai de bovenkant met een vork of spatel rond tot pieken. Bak de meringues +/- 1 uur in de oven of tot ze knapperig aanvoelen. Klop de room voor de garnering met de suiker en het vanille-extract tot zachte pieken.
Schep de helft van de passievruchtenpulp door. Schep de saus over de pavlova's en leg de mangreepjes erop en verdeel de rest van de passievruchtenpulp erover. De pavlova's zijn luchtdicht afgesloten en maximaal 5 dagen houdbaar.
Benodigdheden
Mixer & bakplaat bekleed met bakpapier
Ready In: 90 min.
Ingredients:
Recipes from around the world - Bundle Antillean food: Cheese Balls
"Cheese balls" is a popular appetizer item served at social gatherings on the Dutch Caribbean Islands. It is made using Jong Dutch cheese (better known as Gouda Cheese in the USA). They are easy to make and are very delicious.
Ready In: 30 min.
Ingredients:
Recipes from around the world - Bundle Easy vegan Shakshuka recipe
When I was in Budapest over the Christmas holidays, I had the most delicious Shakshuka! It reminded me of the time when to Israeli guys were making breakfast in a hostel in Japan and they shared some of their delicious meal with me.. However, at that time I wasn't able to remember the name of the dish... so it took me 3 years to finally figure it out, in the Jewish quarter of Budapest.

What is shakshuka?
Shakshuka is a traditional North-African/Israelean dish that can be enjoyed at every moment of the day. It is great for breakfast, lunch and dinner and is very easy to prepare.
While the dish usually comes with eggs cooked on top of the shakshuka base, I will leave this out in the vegan recipe. As a replacement, you can add extra vegetables, olives, tofu-feta (https://simpleveganblog.com/vegan-tofu-feta-cheese/, or just eat it as it is with some delicious bread.
While many variations of shakshuka can be found on the internet, the traditional verson is basically spiced tomate base with onions and garlic (and bell pepper), and eggs on top.
How to make Shakshuka?
1. You start with chopping the onions garlic, red pepper, bell pepper and tomatoes (if you use any) into small pieces.
2. Then you heat 3 tbsp. olive oil in a large iron skillot. Add the onions and garlic and saute them for a couple of minutes. Before the garlic turns brown, add in the red pepper, bell pepper, the spices and the salt and pepper.
3. Cook for about 5 to 10 minutes, but don't let it burn.
4. Add the tomatoes (if you use any), tomato sauce and extra vegetables/tofu if using any. Cook for another 10 minutes.
5. Taste and add more salt and pepper if necessary.
6. Serve the sauce with some parsley on top and some delicious pita bread and/or salad on the side!
Ready In: 25 min.
Ingredients:
Home made HummusBoil chick peas or open a can. Let it cool down or take the liquid out.
Add garlic (I like more than the "normal" recipe) so put as much as you like.
Add olive oil, otherwise it wont blend, make it like a paste.
In the Philippines it is very expensive to buy Tahini, so just put sesame seeds (also adjust to your own taste).
Always a succes! Healthy and easy does it.
Ready In: 10 min.
Recipes from around the world - Bundle Filippijns recept: Chicken Adobo
Na meer dan een jaar hier geleefd te hebben ben ik inmiddels wel bekend met het eten hier. Inmiddels heb ik zelf uitgevonden hoe ik hun 'typische' maaltijd kan maken: Adobo. Het is heel simpel en daarom iets wat ik nog weleens wil maken (ben vanmijzelf zeker geen chef).
Hier wordt veel rijst gegeten (goedkoop) dus maaltijden bestaan vaak uit een homp rijst in combinatie met iets van vlees (en soms, maar jammer genoeg niet regelmatig, groente). Ik lees online verschillende recepten die nog allerlei extra dingen toevoegen: Deze variant is hoe het wordt gemaakt in de armere buurten.
Verhit olie in de pan. bak vervolgens de 2 tenen knoflook en een gesnipperd ui kort aan. Voeg vervolgens het azijn, de sojasaus, en de kip toe. Laat dit sudderen (met deksel erop) voor minimaal 30 minuten zodat het vocht goed in de kip kan trekken en de kip gaar wordt. Dat is het dan, vervolgens kook je de rijst en gebruik je het overvloedige vocht als een 'jus'.
Ready In: 0 min.
Ingredients:
Korean spicy rice cakes skwewers (tteokbokki)
Stap 1: Rice cake koken
1. Was de rice cakes met water.
2. Voeg water toe aan de pan.
3. Kook de rice cakes voor ongeveer 2 minuten op gemiddeld vuur.
4. Zet de rice cakes in een bak met koud water om ze even te laten afkoelen.
Stap 2: Rice cakes skewers
1. Prik ongeveer 6 rice cakes op elk sate prikker.
2. Doe vervolgens wat olie in de pan en pan fry elke skewer 2-3 minuten per kant toch ze goud bruin en krokant worden.
Stap 3: Saus
1. Voeg Korean chili paste, honing, soja saus en sesam olie toe en mix dit voor een minuut.
2. Smeer de saus vervolgens met een kwastje op de rice cake skewers.
3. Serveer het met wat sesamzaadjes en bosui aan top!
Ready In: 15 min.
Ingredients:
Korean Fried Chicken
Stap 1: Kip marineren
1. Was de 1,5 kg kipborrelhapjes met water.
2. Meng de kip met zout, zwarte peper en gember.
3. Meng de kip 1 voor 1 met aardappelzetmeel.
Stap 2: Dubbel frituren
1. Frituur de kip voor 12 minuten.
2. Haal alle kip eruit en frituur vervolgens nog een keer op zacht vuur tot ze goud bruin worden.
3. Begin alvast aan stap 3.
Stap 3: Saus voorbereiden
1. Verhit de pan met wat olie.
2. Zet de pan op gemiddeld vuur.
3. Voeg de knoflook, gedroogde peper, soja saus, honing, azijn en mosterd saus toe en mix het.
4. Voeg als laatst de bruine suiker toe.
Stap 4: Mix de kip met suas
1. Voeg de kip toe aan de pan en mix het met de saus.
2. Voeg als laatst wat sesamzaadjes en bosui toe.
Ready In: 60 min.
Ingredients:
Quinoa recept!Ik had nog nooit van Quinoa gehoord, maar toen in afgelopen zomer in Peru en Ecuador was, kon ik er niet omheen. Ze stoppen het overal in; soep, salades, enz. Heerlijk!
Tot mijn grote verbazing was het ook in Nederland te koop toen ik terug kwam. Hieronder volgt mijn lekkerste (en makkelijkste) Quinoa salade:
Quinoa koken volgens de aanwijzingen, daarna alles bij elkaar in een schaal, beetje mengen en smullen maar!
Ready In: 0 min.
Ingredients:
Recept potjiekos
Zo maak je potjiekos klaar:
Ingrediënten (voor 6 personen)
1 kg rundvlees
6 gesneden aardappelen
1 teentje geperste knoflook
2 gesneden uien
3 gesneden wortelen
300 gram bloemkoolroosjes
15 gram bruine suiker
100 ml sinaasappelsap
125 gram geraspte kaas
Olijfolie
Peper en zout
Bereidingswijze (2 uur)
1. Snijd het vlees in stukjes.
2. Verhit een ruime hoeveelheid olie in een pan, bak het vlees totdat het bruin is en breng het op smaak met peper en zout.
3. Voeg de geperste knoflook en gesneden uien toe aan het vlees in de pan.
4. Als derde laag doe je de stukjes aardappelen erbij.
5. Gooi als laatste de groenten, bruine suiker en sinaasappelsap in de pan en laat het geheel zo’n 1,5 a 2 uur sudderen. Neem af en toe een kijkje onder de deksel om ervoor te zorgen dat het goedje niet droogkookt. Let op: roeren is doodzonde nummer één!
6. Strooi wat geraspte kaas over de potjiekos, vlak voordat je deze serveert.
Eet smakelijk!
recept Sopa Azteca
Dit gerecht heeft mijn hart gestolen. Mijn lievelings eten in mijn gast gezin in Costa Rica. Dit gerecht is Mexicaans maar wordt overal in latijns amerika gegeten. Soort tomatensoep met avocado kaas en kip. Als ik dit gerecht zie denk ik aan Costa Rica en mijn gast gezin. Reeds heb ik dit voor vrienden gemaakt, zij waren zeer onder de indruk.
Ready In: 45 min.
Ingredients:
Rode linzensoep met een Oosterse twist (vegan) 
1. Snipper de ui en snij de knoflook, rode peper en gember fijn.
2. Verhit wat olijfolie in een soeppan en bak de ui zachtjes tot het glazig ziet.
3. Voeg de knoflook, rode peper, gember en ras el hanout kruiden toe en bak voor zo'n 4 minuten.
4. Voeg het blikje tomatenblokjes en de tomatenpuree toe.
5. Wanneer dit verwarmd is, doe je de linzen in de pan en roer je ze goed door.
6. Voeg de bouillon toe.
7. Breng aan de kook, draai het vuur zachter en laat de soep voor 20 tot 30 minuten pruttelen tot de linzen gaar zijn.
8. Pureer de soep eventuueel met een staafmixer en breng op smaak met zout en peper.
Ready In: 40 min.
Ingredients:
Surinaamse pindasoep met tom tom
Met dank aan: https://surinaams-eten.blogspot.com/2010/02/pindasoep-met-tom-tom.html?m=1
Ingredients:
Surinaamse Saoto soep
Deze lekkere saoto soep is zeker de moeite waard. Ingrediënten: – 3 liter water – 600 gram soepkip( het liefst bouten) – 4 cm laos – 4 teentjes knoflook (heel laten) – 1 ui ( schillen en verticaal door de helft snijden) – 1 tak citroengras (sereh) – 1 salam blaadje – 2 grote bouillonblokjes – tuinkruidenbouillon – 1 theelepeltje witte peper Ingrediënten garnituur: – 6 gekookte eieren – 300 gram taugé – 2 pakjes gebakken aardappelstokjes (julien) – 1 pakje soe-on (gebakken vermicelli toko) – gebakken uitjes – 2 dubbele kipfilet gefileerd – 1 takje soepselderij ( fijngesneden) – 1 peper – 5 eetlepel zoute ketjap Benodigdheden: – Soeppan – Rijstkoker om te serveren met rijst
Recept gevonden op surinamcooking.com
Ready In: 0 min.
Recepten uit Afrika of met een Afrikaanse twist van WorldSupporters - Bundel Recepten uit Europa en Europese eetgewoontes: blogs en bijdragen van WorldSupporters Recipes from around the world - Bundle
 Asia
Asia Africa


Add new contribution